Page 1 of 1
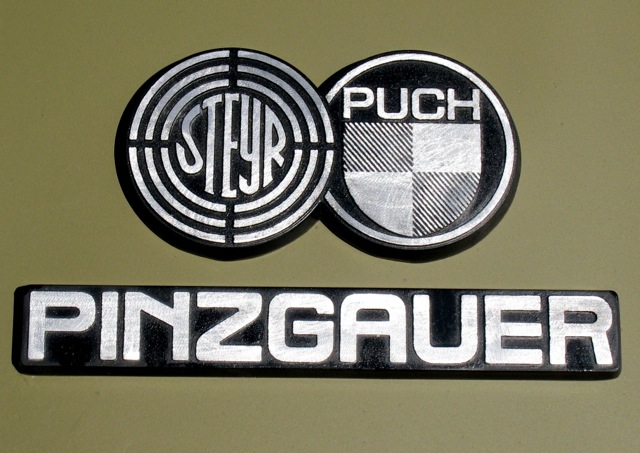
Restoration of the "Steyr Puch" insignia.
Posted: Sun Jan 19, 2014 1:50 pm
by cascade.king
I am looking to restore or at least beautify the Steyr Puch insignia on my truck. I have seen a number of before and after photos, but no "How-To" posts. I was just going to polish mine, but some of the painted ones look nice.
I presume they never came painted on Pinzs or Hafis.. Only bright or OD overpainted.
Re: Restoration of the
Posted: Sun Jan 19, 2014 2:56 pm
by pinzinator
I'm getting ready to strip and powder coat an emblem. I will post photos when it is all done.
Re: Restoration of the
Posted: Sun Jan 19, 2014 4:13 pm
by TechMOGogy
Not a direct answer to your question as I am not sure if they ever came painted or if just OD or bare?
This guy has some nice examples of restored ones
http://pinzgauer-ersatzteile.webnode.at/produkte-1/
Powder coating is great unless you have a NA Pathfinder model which were not OD
Re: Restoration of the
Posted: Sun Jan 19, 2014 4:52 pm
by krick3tt
I removed mine and boiled off all the old paint. Get a cheap pot at the thrift store...do not use your wife's good pan. Used TSP, it removes the paint.
Cleaned it up with a brass wire brush. Painted it black then used fine grit paper on a smooth surface to remove the paint at the letters and then clear coated it.
It is a bear to get off the vehicle as the tiny nuts are way up under the dash at the center console.
I lived near the ocean and the aluminum corrodes easily, giving a dusty look to the finish if not protected.
Re: Restoration of the
Posted: Sun Jan 19, 2014 5:02 pm
by pcolette
I did mine the same as Morris (krick3tt) and used emery paper stapled to a wood block to remove the black paint from the raised areas.
- STP logo.jpg (99.76 KiB) Viewed 6255 times
Like he said you'll need small hands and/or lots of patience to get the retaining nuts off.
Re: Restoration of the
Posted: Sun Jan 19, 2014 6:05 pm
by krick3tt
Looks good Paul. Fine minds.....
Re: Restoration of the "Steyr Puch" insignia.
Posted: Sun Jan 19, 2014 6:09 pm
by cascade.king
TechMOGogy wrote:Powder coating is great unless you have a NA Pathfinder model which were not OD
.. which you know I do.
I wasn't sure if the Steyr Puch logo came plain, or if some models actually had the black-white-green paint.
I like the polished with the black paint in the recesses.
Re: Restoration of the
Posted: Sun Jan 19, 2014 7:23 pm
by TechMOGogy
cascade.king wrote:TechMOGogy wrote:Powder coating is great unless you have a NA Pathfinder model which were not OD
.. which you know I do.
I wasn't sure if the Steyr Puch logo came plain, or if some models actually had the black-white-green paint.
I like the polished with the black paint in the recesses.
I like the black and polished as well but the Pathfinders came just bare metal (99% sure of that from all pictures I have seen and both my Pathfinders were like that - being 40+ years old I guess it could have worn or been changed?!?)
Dan
Re: Restoration of the
Posted: Sun Jan 19, 2014 9:42 pm
by edzz
Interesting list of old Halflinger magazine articles. The emblems can be seen in some of these period publications.
I really have an appreciation for the Australians concept of enhancing the look of a Halflinger in the “Off Road Australia no. 2/1974 article”.
 http://tdc.haflinger-4wd.com/literature/magazines/
Re: Restoration of the
Posted: Mon Jan 20, 2014 11:51 am
by TechMOGogy
I just looked through all the NA Pathfinders that I have pictures of and all but 1 have a bare logo.
The paint may have worn off but I would be surprised if all of it had disappeared on 7 different trucks (8 if you include your truck

) - even the one at the museum is bare. The one with paint is Scott's:

- SDP logo.jpg (58.06 KiB) Viewed 6201 times
I did notice that the Canadian and pre Pathfinder models (white turn signals) seem to be painted?:
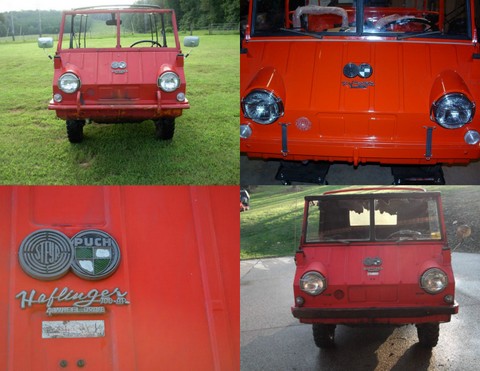
- SDP logo1.jpg (52.5 KiB) Viewed 6201 times
Anyways - all are cool - post what you end up doing and you can make the how-to (then I can copy you!)

Re: Restoration of the
Posted: Tue Jan 21, 2014 2:42 pm
by Haf-e
There are actually two versions of the Steyr-Puch logo plate - the earlier one that was painted with the green and white area in the puch section has a recessed area for the paint to flow in - the later version is flat in that area. I actually have one of each and had the earlier one cleaned up and polished by a local guy who does mostly motorcycle parts. He did a great job. I'll take a photo and will post it here later when I get a chance.
I also ordered one of the reproduction "Haflinger" badges with the handwritten script - I like it more than the newer rectangular one that is similar to the pinzgauer badge. The repo one is really nice - maybe nicer than the original (broken) one I have. The only issue is that the mounting holes are different between the script one and the rectangular one.
Re: Restoration of the
Posted: Wed Mar 19, 2014 8:11 pm
by Pinz710m2
I know this thread was around for a while, but I thought I'd add to it.
I just finished cleaning up the logos for my 710M. I wanted them to
look a little weathered, but not all gooey and gross like they were.
Here's a quick pictorial view of my process. I used a flat engine
paint so they don't look shiny, and I added green to the shield so
it's more like the original.
I used the same techniques as previously described, with a green color twist.


The final product. Painted twice and sanded twice.


Re: Restoration of the "Steyr Puch" insignia.
Posted: Wed Mar 19, 2014 9:01 pm
by cascade.king
Purdy!
Re: Restoration of the
Posted: Wed Mar 19, 2014 11:21 pm
by krick3tt
Good job. Be sure to clear coat it to keep it looking this good.
Re: Restoration of the
Posted: Thu Mar 20, 2014 2:55 pm
by westernair
I stripped mine with Oven cleaner, then took it to the polishing wheel and made her shine line a piece of Jewlery. Afterwards I painted it with white black and green.
Once Painted I took a piece of deer leather with a little MEK on it and polished off the unwanted paint.
Total time from start to finsh was about 2.5 hrs.