Page 1 of 1
Webasto Air Top 2000 Install
Posted: Mon Apr 26, 2021 2:55 pm
by Mr Zero
Re: Webasto Air Top 2000 Install
Posted: Thu May 27, 2021 5:59 pm
by Mr Zero
By the way, if you search eBay for "Webasto Air Top 2000" you should find a number of Russian sellers selling in the $600-$700 range with a "Best Offer" option. A $500-$550 offer should get you one of these heaters. It did for me. If you can find one, a 24V petrol Chinese heater is going to cost you the same.
The Webastos out of Russia seem to be new surplus as they ship without manuals, installation instructions, etc. However, I had great communication with the seller and got a sweet deal.
Re: Webasto Air Top 2000 Install
Posted: Fri May 28, 2021 9:39 am
by whitesik
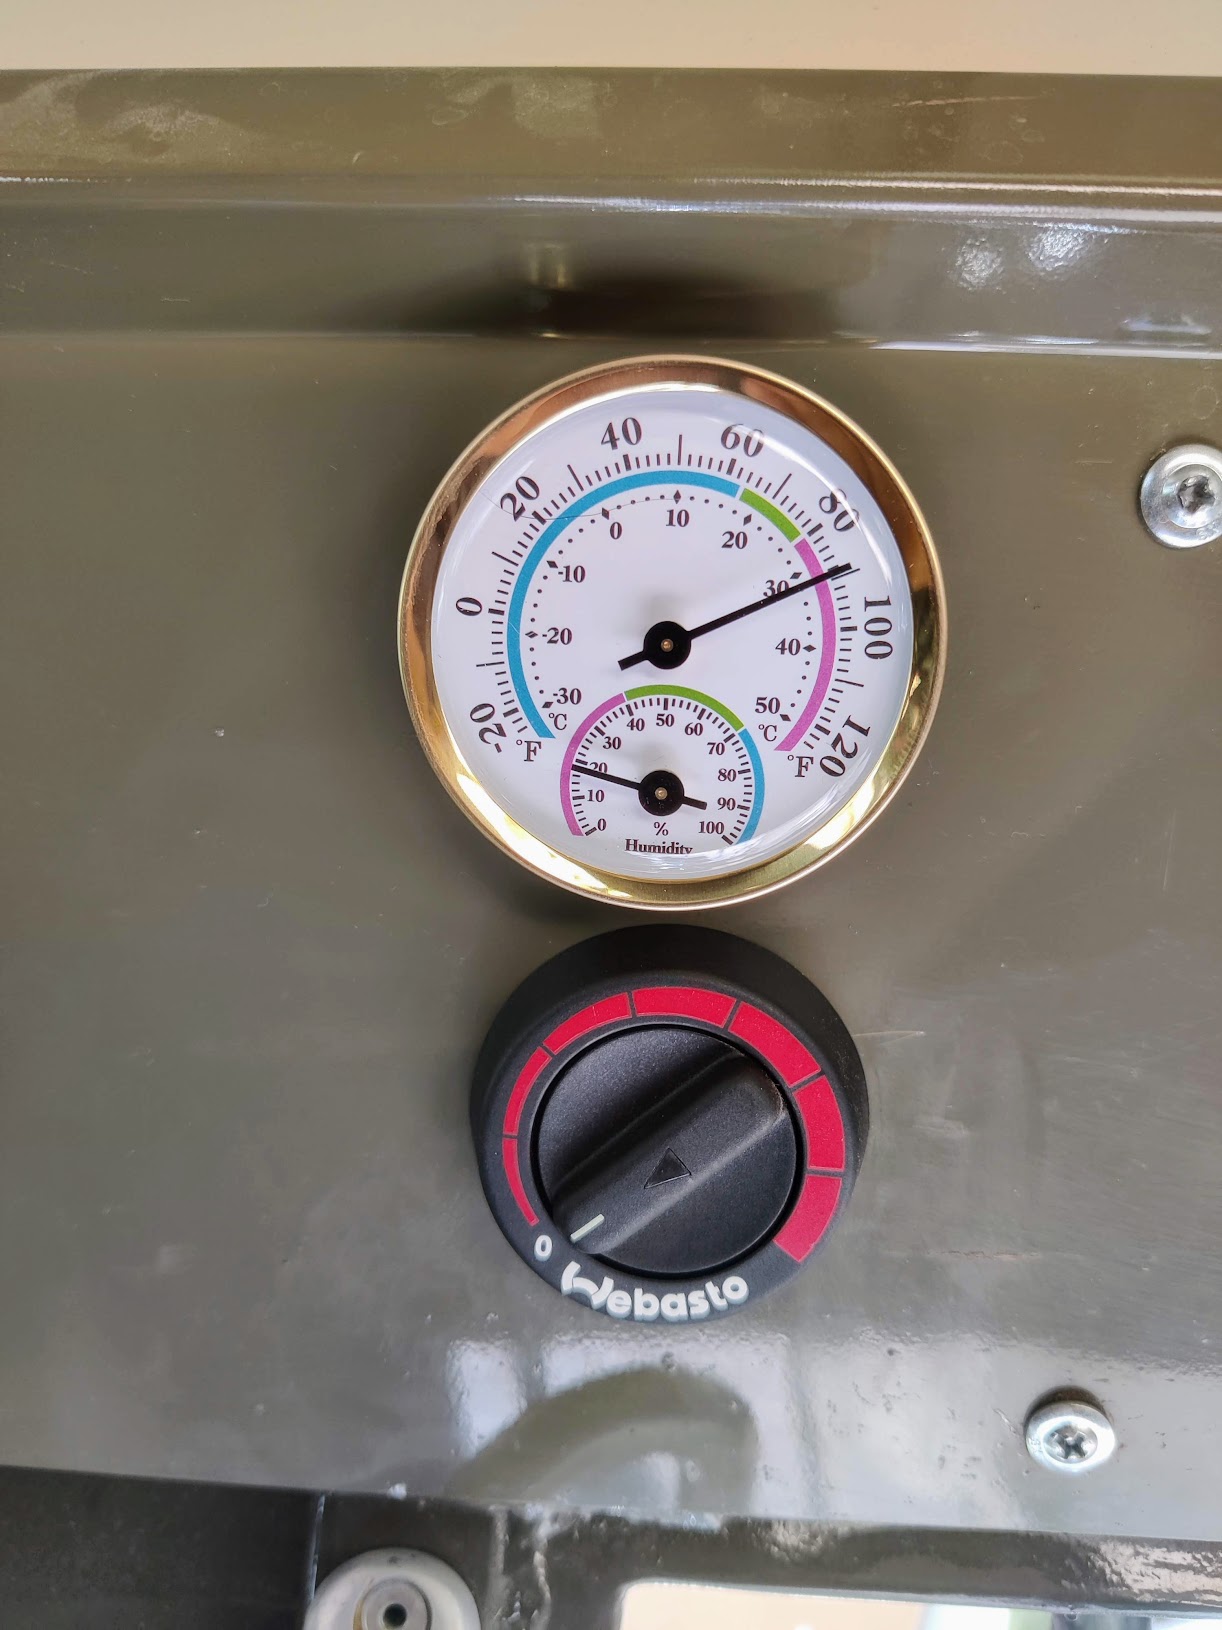
That looks great! Can you post more about where and how you mounted the controller?
Re: Webasto Air Top 2000 Install
Posted: Sun Aug 29, 2021 6:09 pm
by Mr Zero
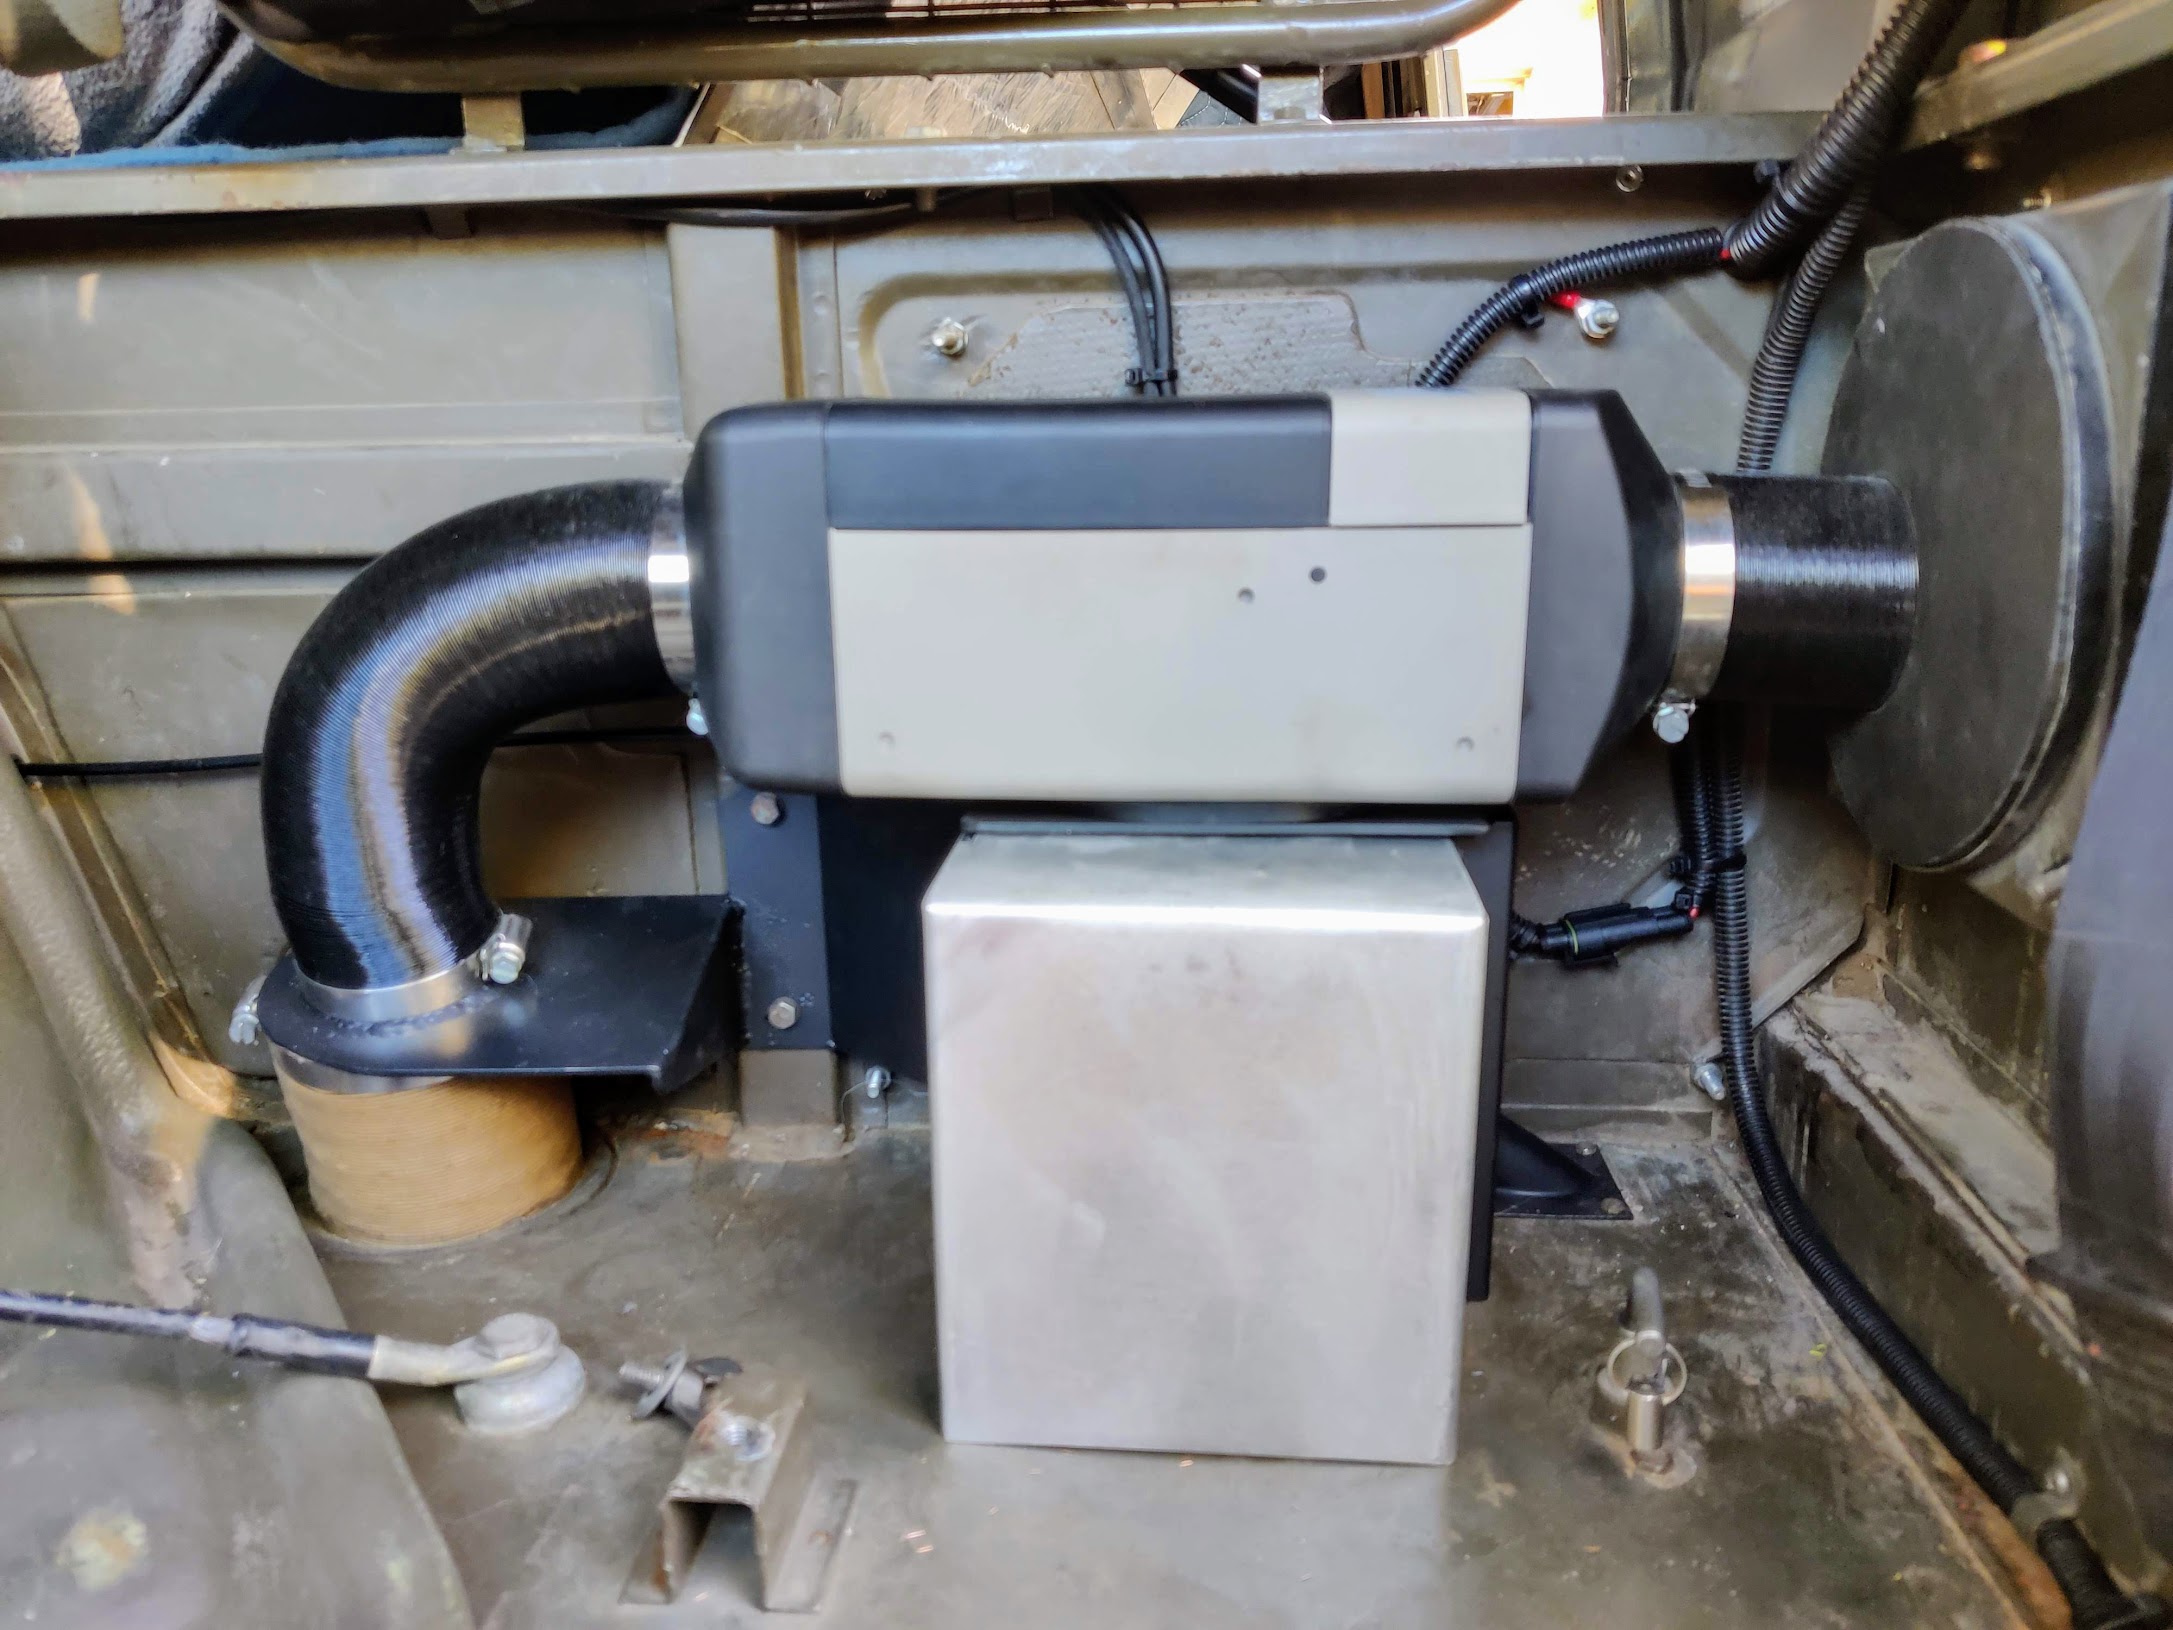
My hardtop is new fabrication by Andre at Fat Fabrications due to some "unpleasantness"... Anyway, the new top has additional framing and reinforcements. The top has paneling in the interior upper corners that runs the length of each side in order to conceal electrical, etc. I mounted the heater controller on this panel in the rear section of the vehicle so it could be easily accessed from our sleeping area. Specifically, I ran the harness from the heater, under the lip of the cab wall using the wire retention clips (as did the original heater electrical), to the passenger side, up the wall and behind the aforementioned paneling.
The harness provided with the heater is long enough to fit the controller literally anywhere inside the truck.

Re: Webasto Air Top 2000 Install
Posted: Sun Nov 20, 2022 10:38 am
by whitesik
I am resurrecting an old thread here to see how the Webasto heater is doing. Yes, life and procrastination has bitten me as the price on these have skyrocketed but i may still get one. I have read about some problems with sooting in the petrol model that have caused malfunction and/or high maintenance. Any issues after a year? Still recommend? Thanks!
Re: Webasto Air Top 2000 Install
Posted: Thu Dec 01, 2022 6:20 pm
by Mr Zero
whitesik wrote: ↑Sun Nov 20, 2022 10:38 am
I am resurrecting an old thread here to see how the Webasto heater is doing. Yes, life and procrastination has bitten me as the price on these have skyrocketed but i may still get one. I have read about some problems with sooting in the petrol model that have caused malfunction and/or high maintenance. Any issues after a year? Still recommend? Thanks!
The Webasto is still rock'n it! The only mod I've made is to add a valved Y-duct (pictured below) for the option to regulate between bunk and cabin heat. I highly recommend reading and following the guidance in
this article and you shouldn't have any maintenance issues. TLDR, run the unit at max output to heat the interior to desired temp then discontinue use. Running at max significantly mitigates carbon build-up. The only other observation that I have to offer is that ambient temps above the built-in safety no-start (84F?) can prevent the prescribed monthly maintenance run of the unit (15min on max output), so this will result in a few false starts when you do finally run the unit due to fuel having drained from the line. In this situation the 2nd or 3rd start will fire it up and then every time after that within a few of weeks of priming the pump/line. I still highly recommend this unit.

Re: Webasto Air Top 2000 Install
Posted: Thu Dec 01, 2022 7:22 pm
by whitesik
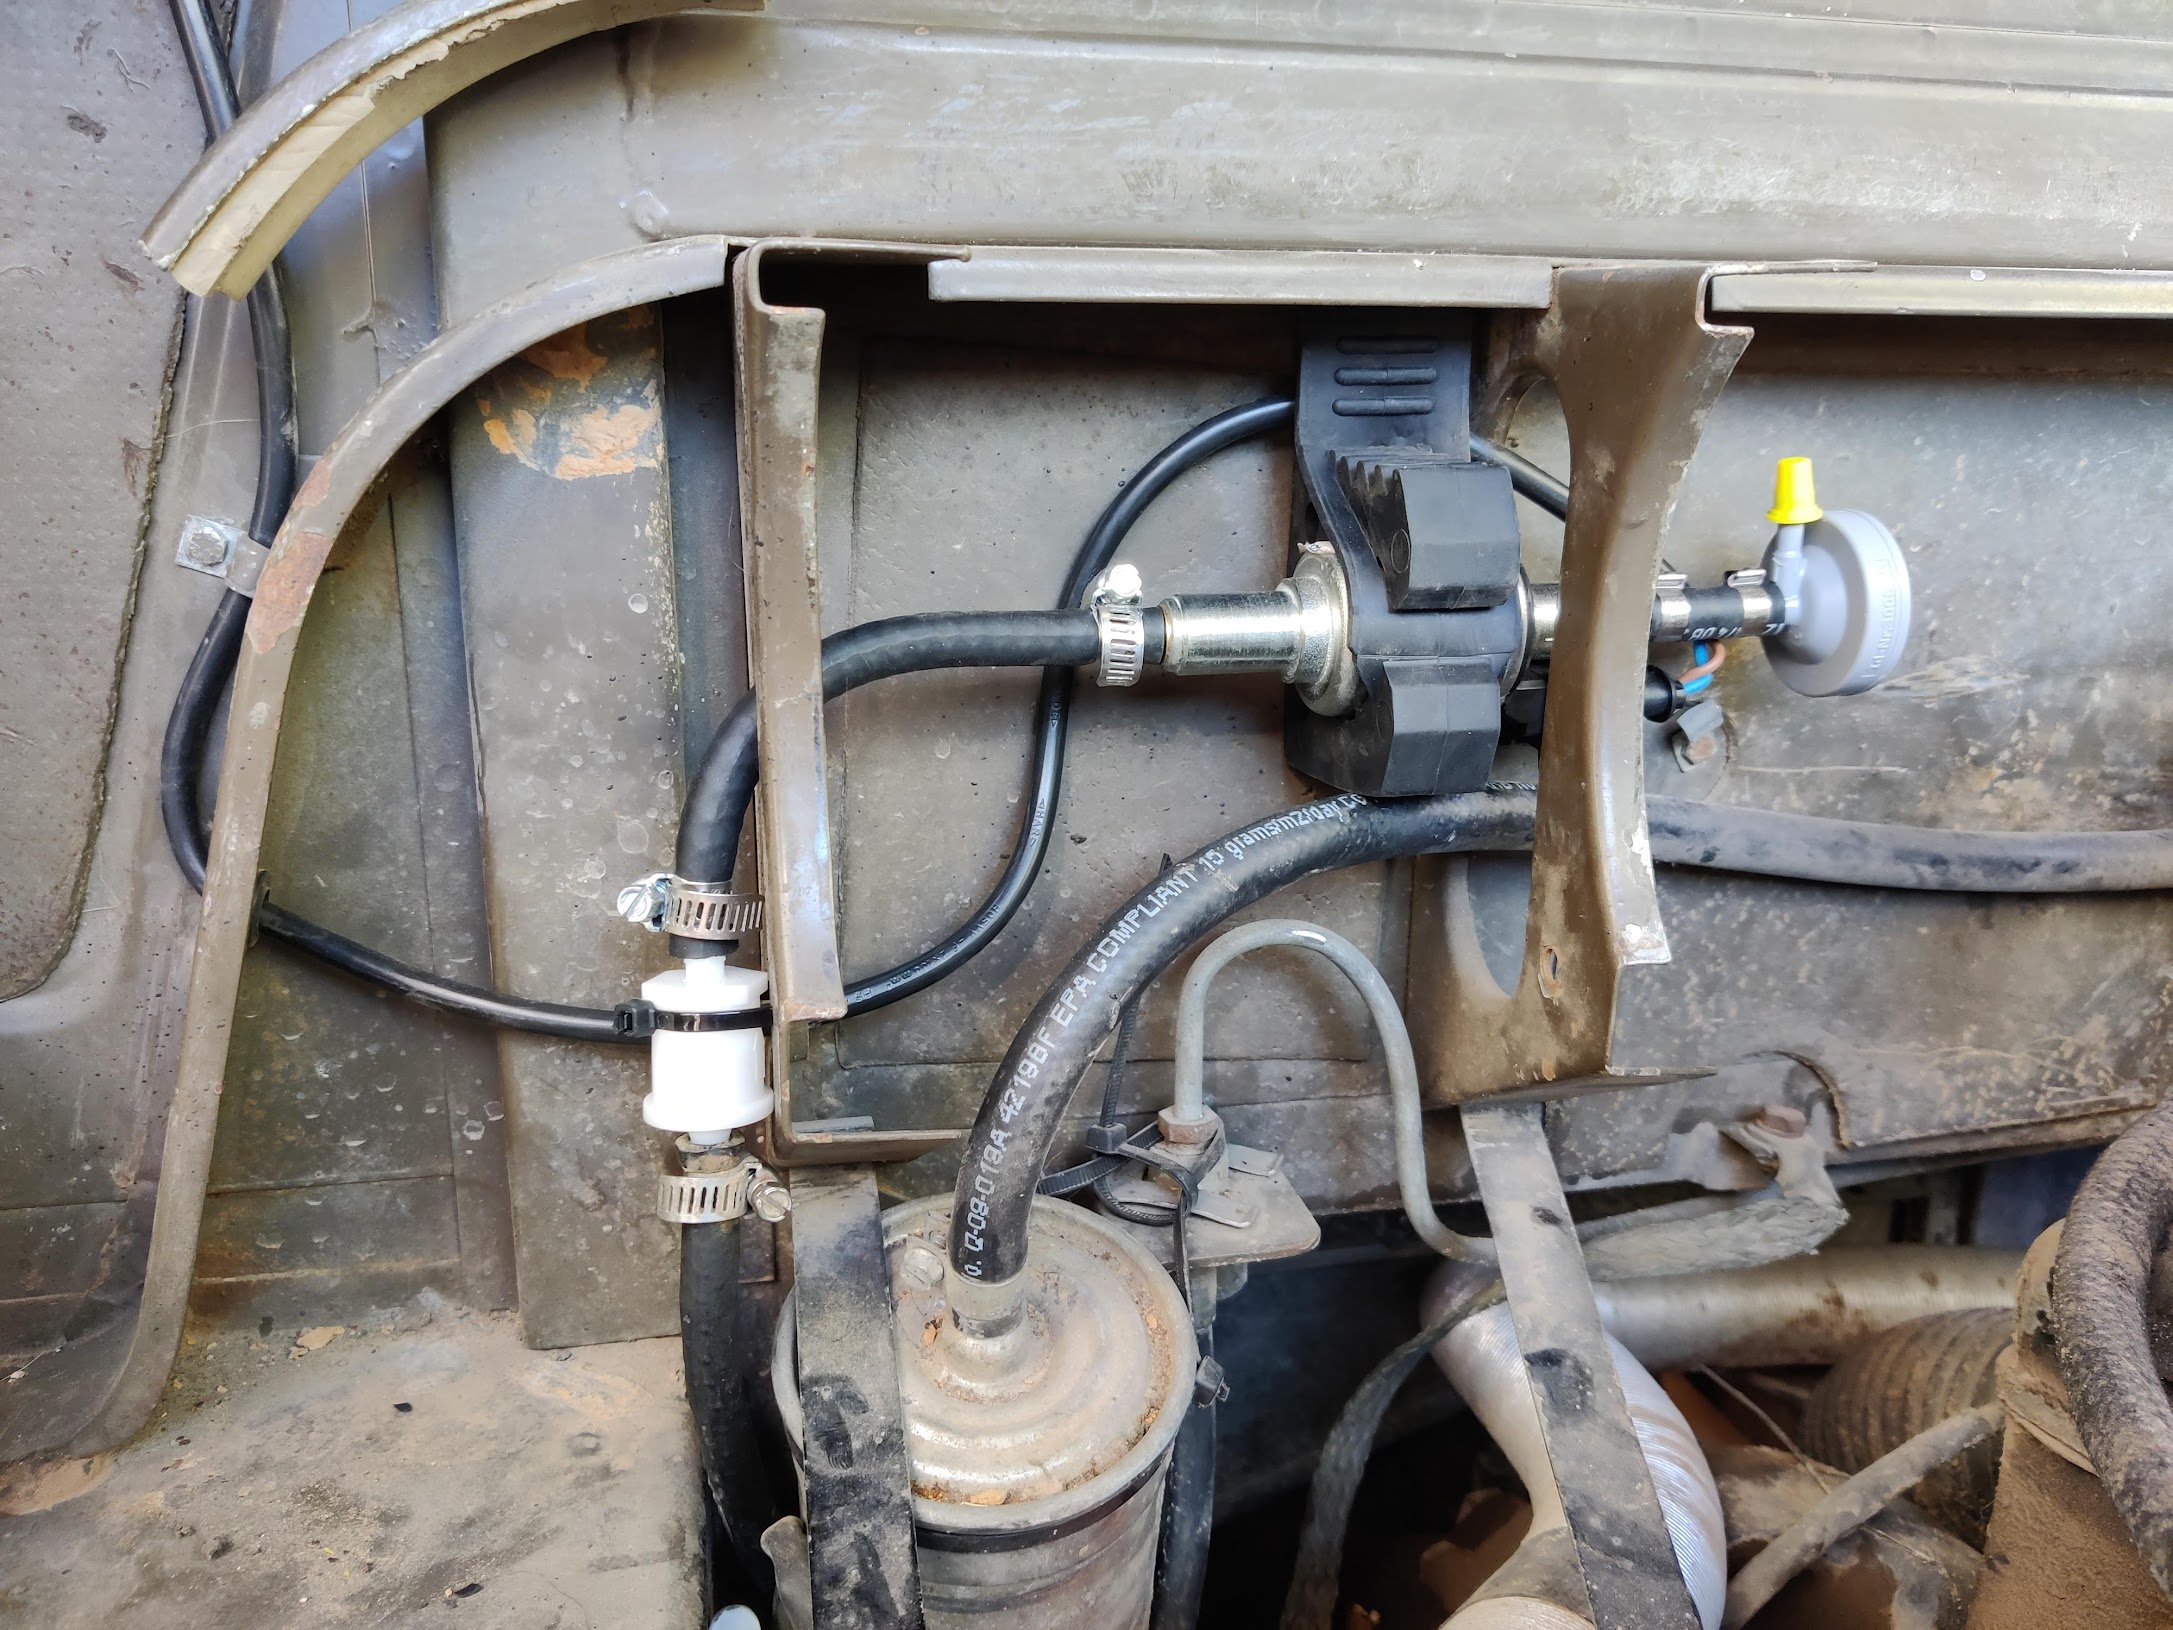
Thanks Jason. My thoughts exactly on the valve for up front vs. rear. Sounds like it also needs a bulb primer in the line for those times it sits too long.
I don't see the pic.
Re: Webasto Air Top 2000 Install
Posted: Fri Dec 02, 2022 12:41 am
by Mr Zero
whitesik wrote: ↑Thu Dec 01, 2022 7:22 pm
I don't see the pic.
It should be displaying properly now.
Re: Webasto Air Top 2000 Install
Posted: Mon Aug 28, 2023 9:35 am
by Hugues
Hi,
looking into adding a diesel heater to my 710M.
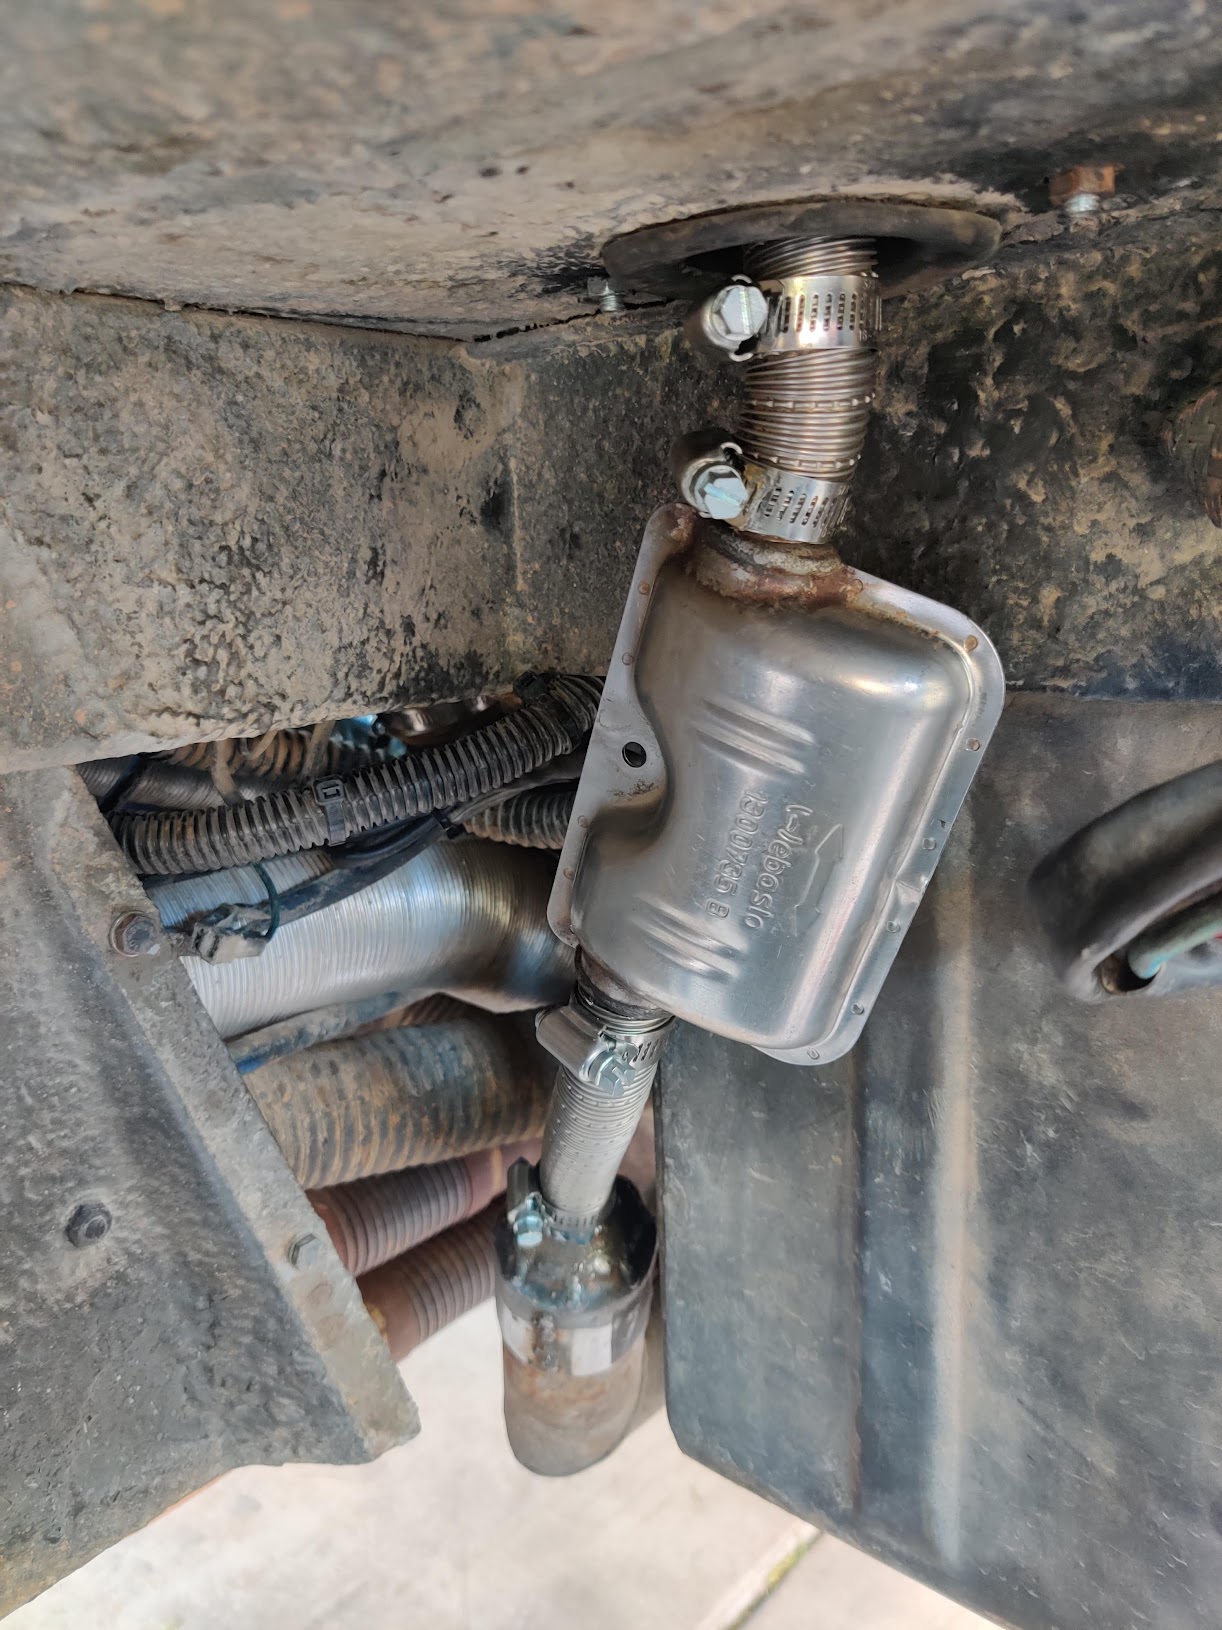
From your first pictures, do i get it right that you routed the combustion exhaust between the front left wheel and the battery box ?
I have a metal panel currently in this location, probably to prevent rocks from hitting the battery box /and support for the battery box.
Have you been able to run your system with this panel back in its original place ? (i can't see that panel in your third picture).
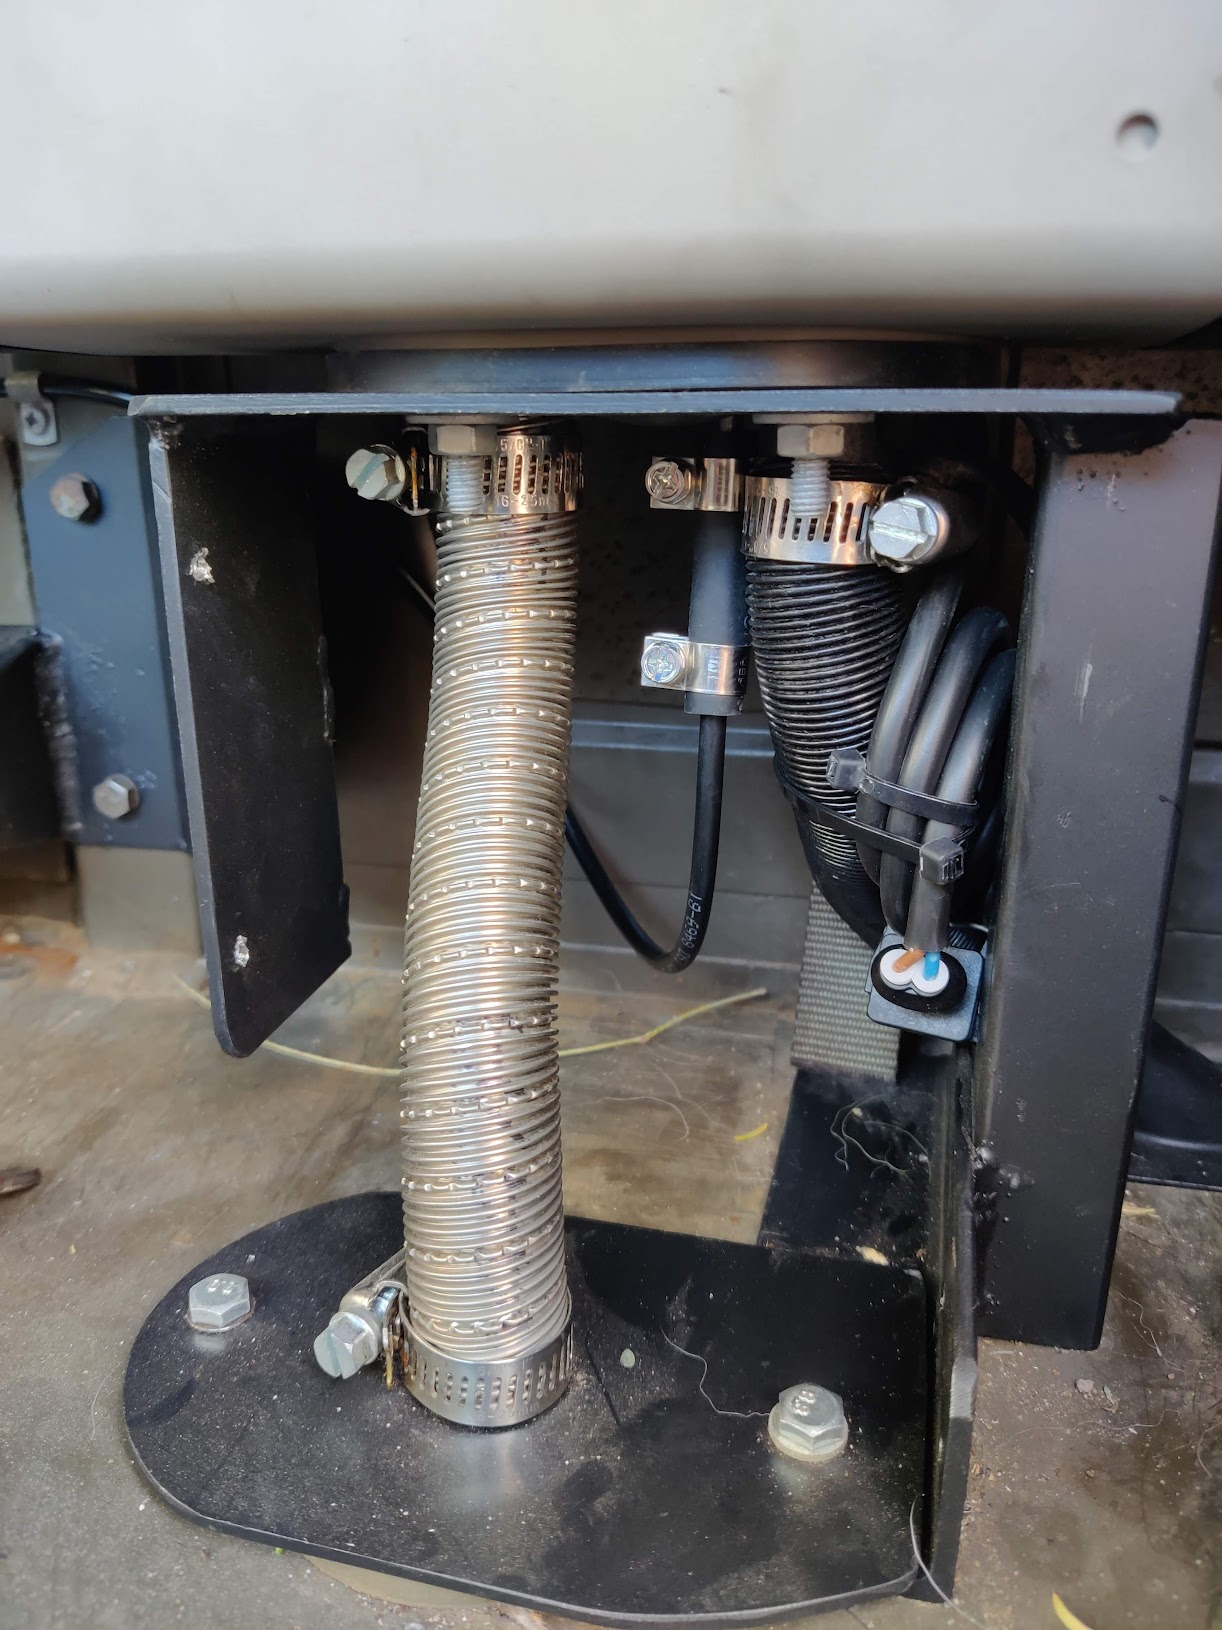
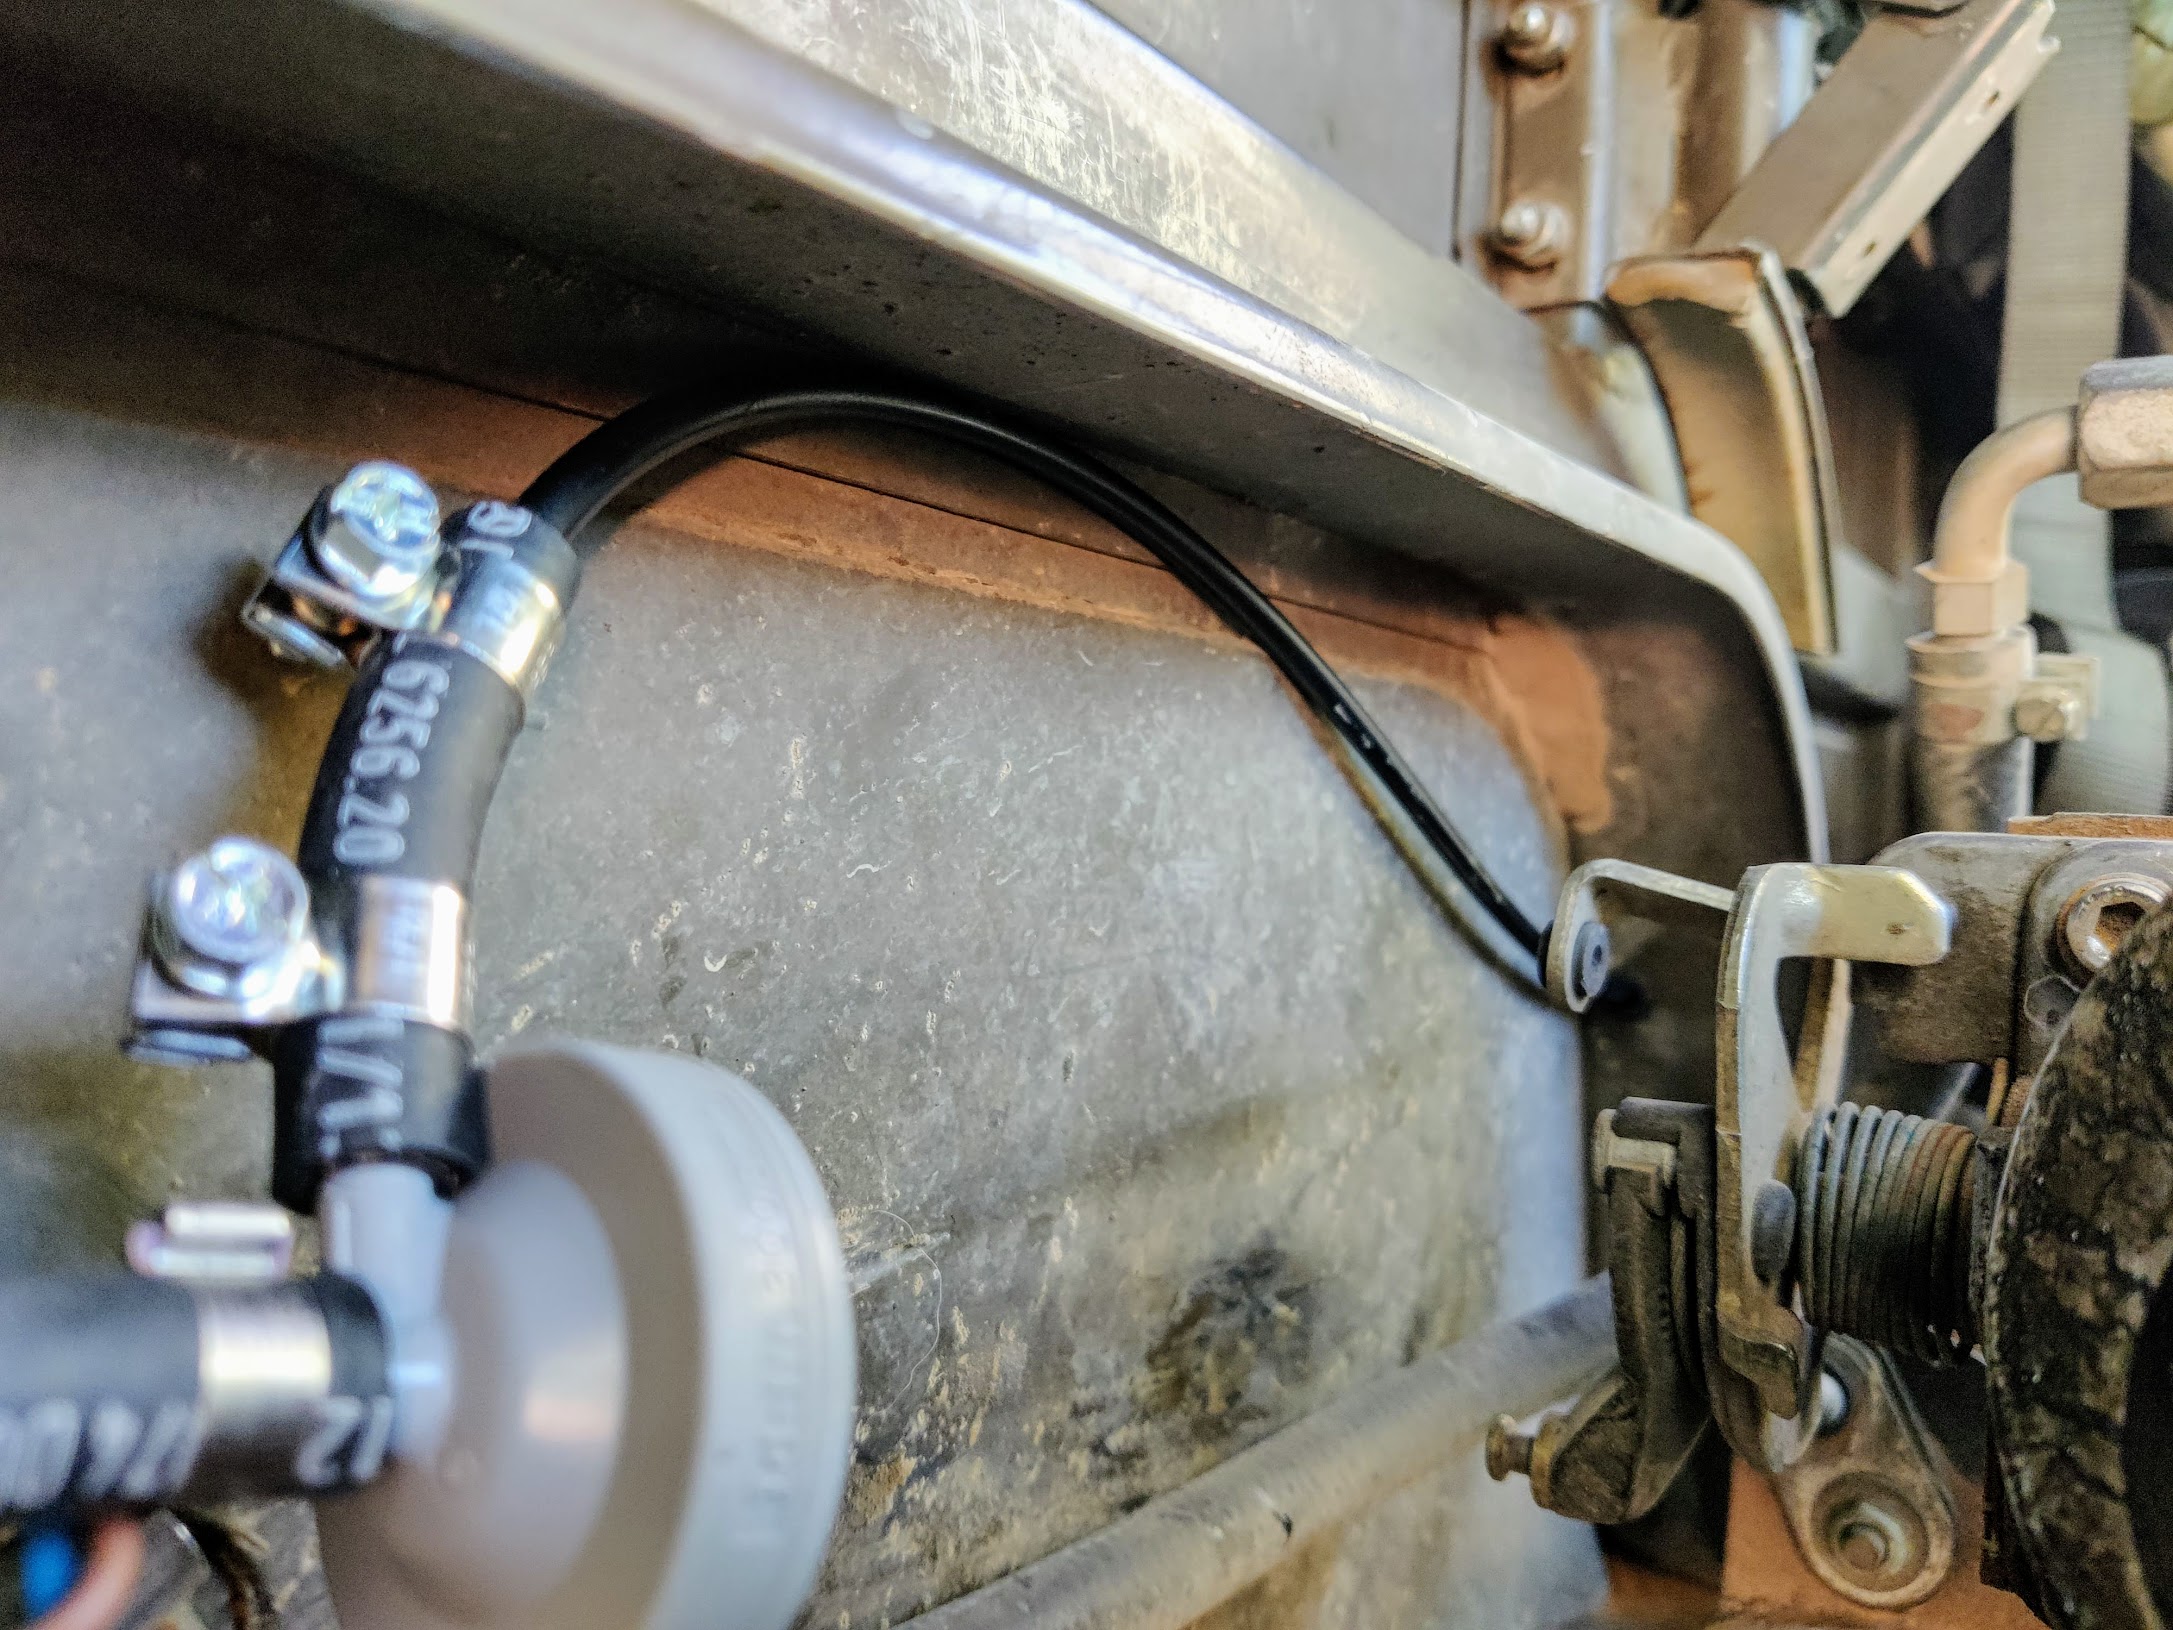
Then, where did you get the combustion air intake from ? black pipe on your second picture. Seems to be coming from the battery box ?
I was planning to install my diesel heater at the same place behind the driver's seat but on the floor, not raised up like you did.
Re: Webasto Air Top 2000 Install
Posted: Mon Aug 28, 2023 12:14 pm
by Mr Zero
Hugues wrote: ↑Mon Aug 28, 2023 9:35 am
From your first pictures, do i get it right that you routed the combustion exhaust between the front left wheel and the battery box ?
Have you been able to run your system with this panel back in its original place ? (i can't see that panel in your third picture).
Yes, this is the factory combustion exhaust ducting on the 710K and should be possible to replicate in an M without any obstacles.
Hugues wrote: ↑Mon Aug 28, 2023 9:35 am
Then, where did you get the combustion air intake from ? black pipe on your second picture. Seems to be coming from the battery box ?
That is correct. Again this is factory intake ducting on the 710K that pulls air from the void above the battery box. I added a low restriction foam lawn mower air filter into the void to minimize dust intake.
Hugues wrote: ↑Mon Aug 28, 2023 9:35 am
I was planning to install my diesel heater at the same place behind the driver's seat but on the floor, not raised up like you did.
My heater mount was designed to take advantage of the factory (710K) heater mounting holes and ducting. Since you'll be making some additional mods to fit the heater in an M, I'm sure you can accomplish a lower profile installation.
I should have some additional photos of the installation if you'd like to see them.
Re: Webasto Air Top 2000 Install
Posted: Mon Aug 28, 2023 12:44 pm
by Hugues
ok, thanks a lot
i will have a detailed look these coming days and come back if i have any doubts
thanks
Hugues
Re: Webasto Air Top 2000 Install
Posted: Mon Aug 28, 2023 8:55 pm
by Mr Zero
Mr Zero wrote: ↑Mon Aug 28, 2023 12:14 pm
My heater mount was designed to take advantage of the factory (710K) heater mounting holes and ducting. Since you'll be making some additional mods to fit the heater in an M, I'm sure you can accomplish a lower profile installation.
Reviewing the photos of the install I was reminded that the other reason for the heater positioning was to align the unit with the factory fresh air intake vent...