
... so I disconnected them and pulled them to make it easier to clean up and do some painting. I thought I remembered seeing something in one of the owner's manual pdf files about proper procedure when disconnecting and reconnecting them, but I can't seem to find it now.
Besides the obvious cross polarity and arching screw-ups, anything special to watch out for, or procedures to follow?
Thanks
Doing some battery area work.....
-
sixbennetts
- Posts: 198
- Joined: Thu Dec 01, 2011 7:15 pm
- Location: Plattsburgh, NY
-
westernair

- Posts: 748
- Joined: Sat Jan 01, 2011 11:14 pm
- Location: Tacoma, WA
Re: Doing some battery area work.....
Not sure if this is correct, but I have always connected the positive and ground leads from the truck before connecting the jumper cable.
I remove the jumper 1st when disconnecting.
I remove the jumper 1st when disconnecting.
Shawn
62 haffy Bantam
61 haffy 4 door
72 710K - Sold
73 712M - Sold
62 haffy Bantam
61 haffy 4 door
72 710K - Sold
73 712M - Sold
-
Jimm391730
- Posts: 1456
- Joined: Wed Apr 14, 2004 10:58 pm
- Location: Idyllwild, CA
Re: Doing some battery area work.....
The order that the connections are made are not important; it is the last one that finally allows power to the truck (assuming that the battery key is on). If the battery key is off then you won't get a spark.
Basically, turning the battery key off does the exact same thing as disconnecting any of the four battery terminals. Turning the battery key on is the same as making the last of the four battery connections. This all assumes that the batteries are connected with the proper polarity (- of one battery to the black cable that goes to the battery key switch, + of that battery to - of the second, and + of the second to the red cable to the starter).
Basically, turning the battery key off does the exact same thing as disconnecting any of the four battery terminals. Turning the battery key on is the same as making the last of the four battery connections. This all assumes that the batteries are connected with the proper polarity (- of one battery to the black cable that goes to the battery key switch, + of that battery to - of the second, and + of the second to the red cable to the starter).
Jim M.
712W and 710M
712W and 710M
-
sixbennetts
- Posts: 198
- Joined: Thu Dec 01, 2011 7:15 pm
- Location: Plattsburgh, NY
Re: Doing some battery area work.....
I don't think I have a battery key switch, do I? Is that a Pinz thing? I have a Volvo.
-
VinceAtReal4x4s

- Admin
- Posts: 2042
- Joined: Mon Apr 12, 2004 10:36 pm
- Location: Ca. or lost in South West USA
- Contact:
Re: Doing some battery area work.....
No you don't have one.
"For those who risk, life has a flavor the protected shall never enjoy"
Your donation makes this site possible!

Your donation makes this site possible!
-
sixbennetts
- Posts: 198
- Joined: Thu Dec 01, 2011 7:15 pm
- Location: Plattsburgh, NY
Re: Doing some battery area work.....
K, thanks.
I found the reference I was thinking of. It was about not disconnecting the battery terminals while the engine is running or you blow the regulator.
I found the reference I was thinking of. It was about not disconnecting the battery terminals while the engine is running or you blow the regulator.
-
Jimm391730
- Posts: 1456
- Joined: Wed Apr 14, 2004 10:58 pm
- Location: Idyllwild, CA
Re: Doing some battery area work.....
Oops, wrong section of the forum, sorry. But it still doesn't matter which gets broken first or connected last. And yes, the battery is a necessary part of the charging system when the engine is running; never disconnect the battery then! Pinzgauers have an automatic relay that prevents damage if someone turns off the battery key when the engine is running for that very possibility.I don't think I have a battery key switch, do I? Is that a Pinz thing? I have a Volvo.
Jim M.
712W and 710M
712W and 710M
-
sixbennetts
- Posts: 198
- Joined: Thu Dec 01, 2011 7:15 pm
- Location: Plattsburgh, NY
Re: Doing some battery area work.....
No problem, Jim. That's what I figured. 'Preciate yer comeback, though. 
-
Jim LaGuardia
- Posts: 1704
- Joined: Wed Apr 14, 2004 3:42 pm
- Location: San Bernardino Ca
- Contact:
Re: Doing some battery area work.....
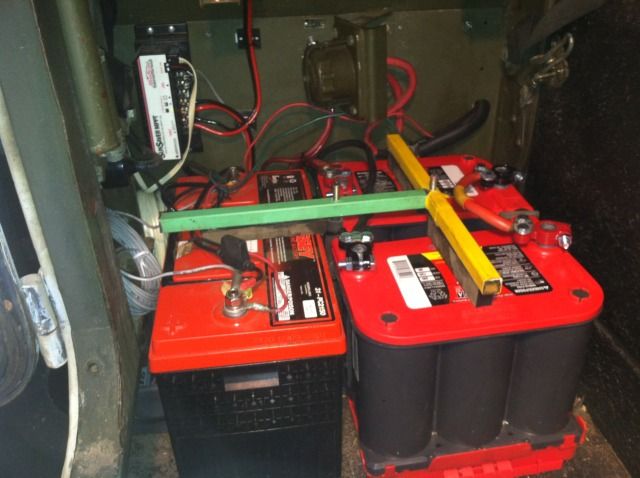
Here are a few pic's of Greg's new battery restraint system(From Fat Fab).
First, 2 nutcerts into floor(after measuring twice), insulated studs in place.

Shrink wrapped and rubber footed restraint bar.
Next comes the rubber dust/insulating blanket.
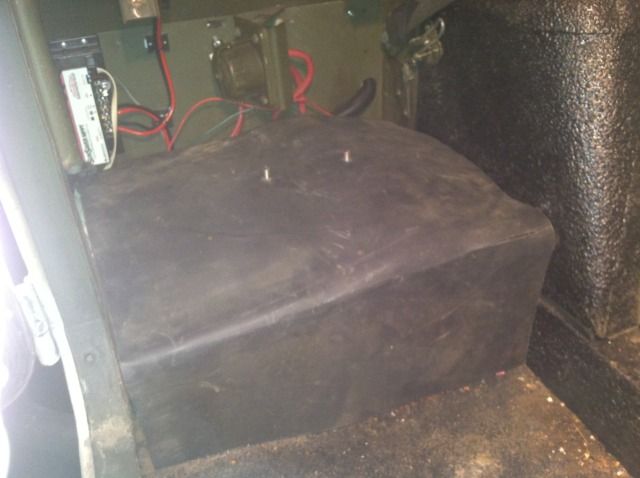
Then the final battery covering secured with 2 wing nuts.
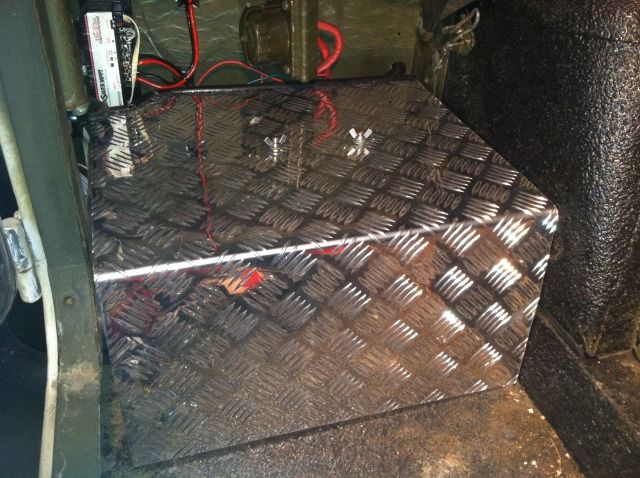
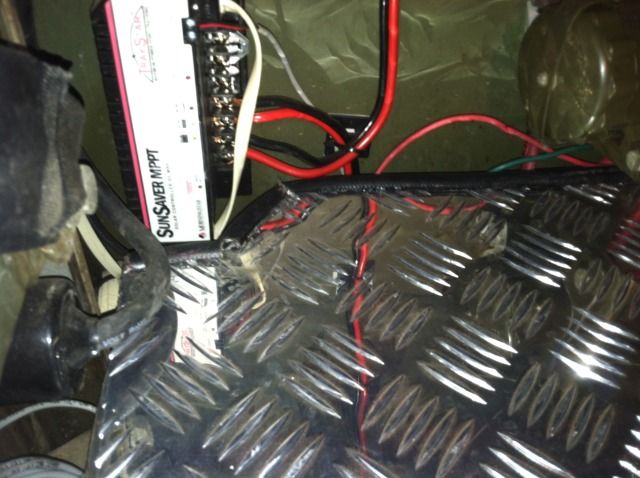
A close up of insulated edge to prevent wire chaffing.
First, 2 nutcerts into floor(after measuring twice), insulated studs in place.
Shrink wrapped and rubber footed restraint bar.
Next comes the rubber dust/insulating blanket.
Then the final battery covering secured with 2 wing nuts.
A close up of insulated edge to prevent wire chaffing.
Re: Doing some battery area work.....
I really like how it all fits into that small area. Jim and Andre did a great job. I should point out that the truck has two completely separate systems. The two Optima batteries comprise the 24v system and the Odyssey battery is hooked into a solar charge controller with a solar panel on the roof. The 12v accessories can be used without draining the 24v system. I have run a 12V line to the rear to a cigarette type receptacle. From here I run an ARB fridge that is on all the time and it works great.
Cheers,
Greg
Cheers,
Greg

HafWit
a.k.a. Phlyphysher, Greg, & Clamphysician
1967 Swiss Haflinger, 1975 Volvo C303