Page 7 of 7
Re: Miles Pinz Restoration Progress (pic heavy-milestone thr
Posted: Mon Feb 18, 2013 12:57 pm
by crcpinz
I really like the design of that front bumper. I thought I would never change mine, but this I would do. Not that I need the lights, because I never drive at night.
Re: Miles Pinz Restoration Progress (pic heavy-milestone thr
Posted: Mon Feb 18, 2013 3:33 pm
by Profpinz
Lovely work as always Miles!
Re: Miles Pinz Restoration Progress (pic heavy-milestone thr
Posted: Sat Apr 26, 2014 10:29 pm
by edzz
Wondering how your rebuild is going, look forward to viewing more of your hand work.
Best wishes
Ed
Re: Miles Pinz Restoration Progress (pic heavy-milestone thr
Posted: Wed Apr 30, 2014 8:49 pm
by milesdzyn
Here's a small update as to what I've done.
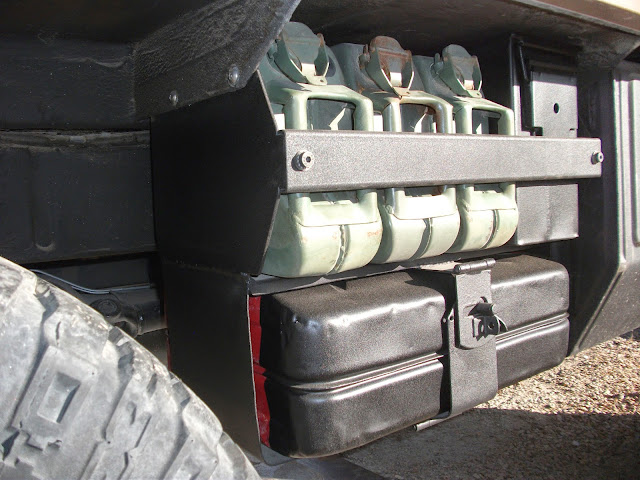
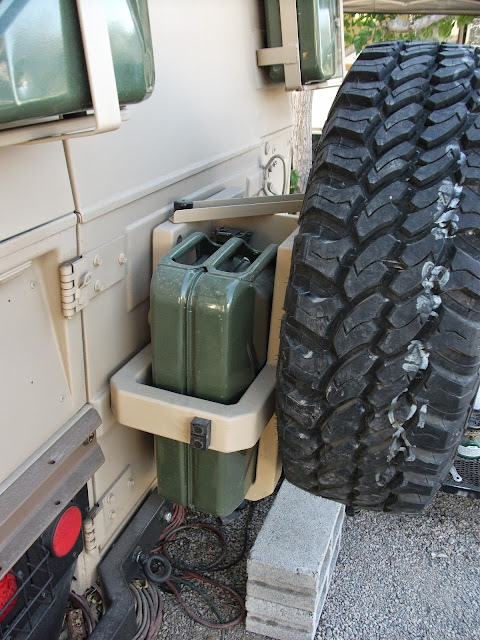
I added to the spare Jerry can holder so I could fit three, 1 gallon Jerry cans for Oils and a small ammo can for chains.
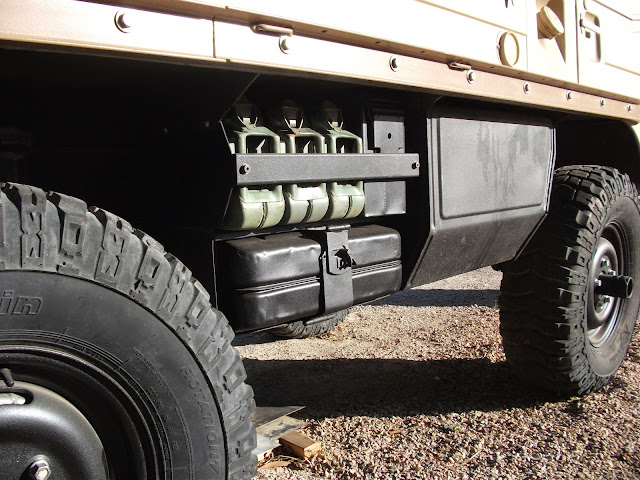
Simple construction, just add some sides to lower the original part and weld together.
Got the rear bumpers done as well as mounting LED lights.

Side view of bumper using the original mounting points.
I have turned the mud guard to the inside when wheeling and it gets secured into position with a nut.
This way the whole mud flap is inboard of the bumper and can't catch on rocks.
Overall view of the rear.

Adding a simple piece of angle to the spare tire plate and drilling a hole makes for a easy locking point.

Surprise, added two more Jerry cans to the door. Yes the hinges are holding up just fine and no difference in how the door hangs.
It worked out really nice when fully opened.

A small rubber bumper works for now but I want to add another bumper to the tire surface as well.

Most of the interior is done and I have moved in.
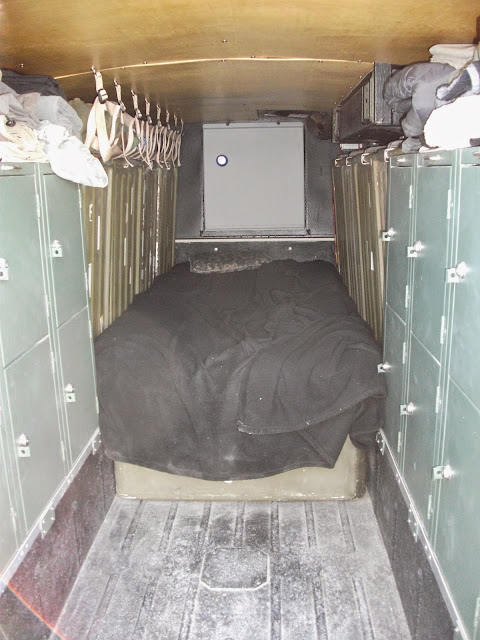
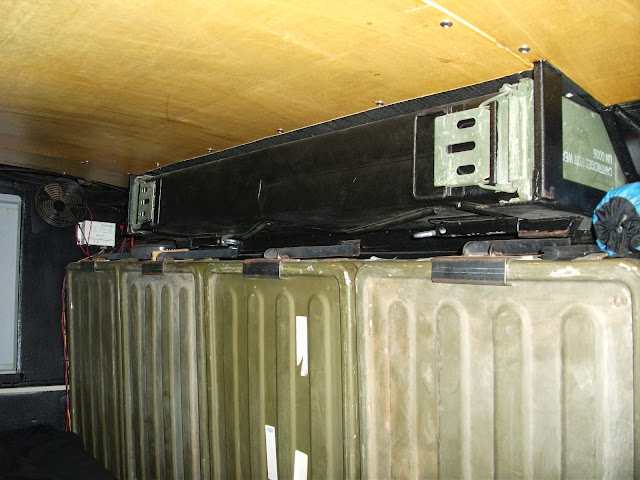
Locking storage container for long items.
Webbing will secure soft items.

So that's it for now, got some electrical to sort out, then I will start on the cab interior.
Miles
Re: Miles Pinz Restoration Progress (pic heavy-milestone thr
Posted: Wed Apr 30, 2014 10:44 pm
by Doccers
Miles, My jaw is on the freaking floor. I am severely impressed.
One question: With extending the spare out like that, are you at all worried you'll tweak the rear door hinges by putting excess weight/torque on them?
By the way, You're the one to blame for me getting interested in a 6x6 Pinzgauer in the first place - which lead to me buying the C304 Volvo.
ALL. YOUR. FAULT.

Also I hadn't considered a long box like that for locking storage... that's a damn eloquent solution. Better than the custom cabinet I was going to build.
Re: Miles Pinz Restoration Progress (pic heavy-milestone thr
Posted: Thu May 01, 2014 12:14 am
by edzz
Thanks for the update. That rear bumper and tire lock have put ideas in my head, might be time for a trip to the metal yard.

Re: Miles Pinz Restoration Progress (pic heavy-milestone thr
Posted: Thu May 01, 2014 1:12 am
by Jimm391730
Looks like you can store everything you've ever owned in your life in the back!
Love those rear bumpers. Where did you find the storage net?
Re: Miles Pinz Restoration Progress (pic heavy-milestone thr
Posted: Thu May 01, 2014 9:38 pm
by milesdzyn
Doccers wrote:One question: With extending the spare out like that, are you at all worried you'll tweak the rear door hinges by putting excess weight/torque on them?
Also I hadn't considered a long box like that for locking storage... that's a damn eloquent solution. Better than the custom cabinet I was going to build.
The hinges should hold up to the extra weight, no problems yet and I keep them oiled.
The storage box is two long ammo cans chopped and welded together, it's heavy but secure.
Jim, I made the webbing myself on a sewing machine, really easy to do.
Miles
Re: Miles Pinz Restoration Progress (pic heavy-milestone thr
Posted: Fri May 02, 2014 9:02 pm
by Middlebury_Pinz
Beautiful work Miles, thanks for sharing!
Re: Miles Pinz Restoration Progress (pic heavy-milestone thr
Posted: Thu May 22, 2014 6:13 pm
by milesdzyn
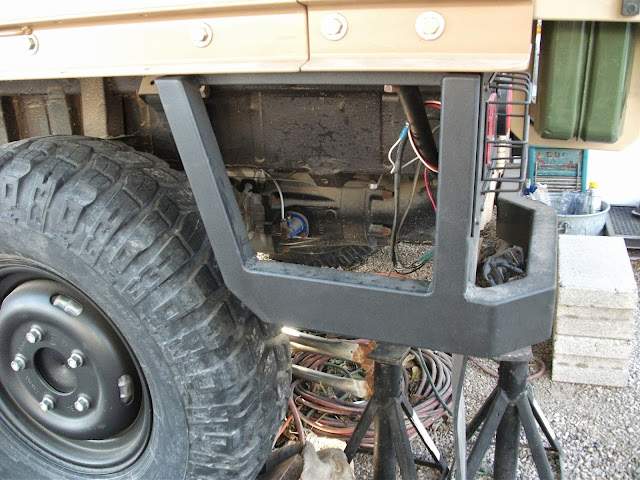
So I needed a platform to stand on while accessing the stuff in my roof rack and had some of this step grating.
The platform is just long enough to be useful and designed to fit anywhere along my rails.
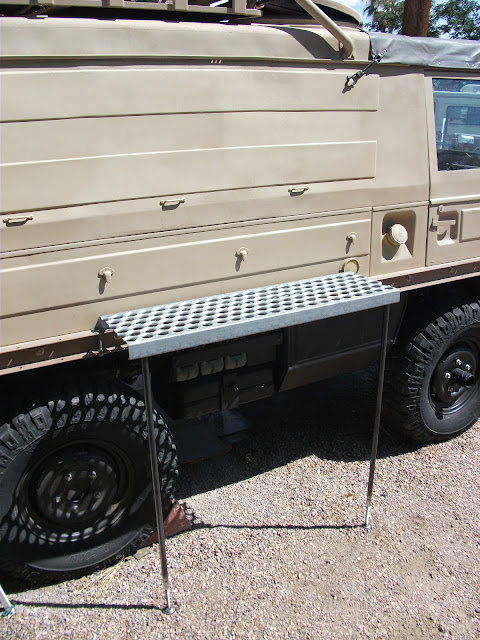
2 bolts secure it to the rail and 2 legs with adjustments for uneven terrain.

No extra cross support was needed as the pressed pattern creates a strong cross section, enough to hold my weight plus a full medical chest full of stuff.

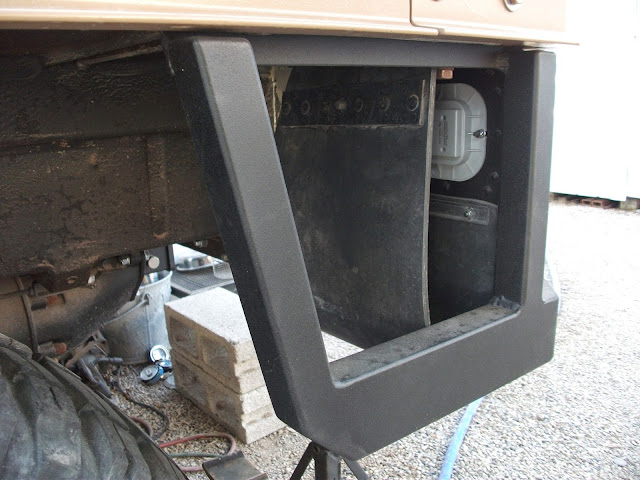
The legs screw off for storage.

And the legs have -4" to +7" of travel with cupped ends for a solid support on most ground.

When not used to access the roof rack it will be used as a work bench.
Miles
Re: Miles Pinz Restoration Progress (pic heavy-milestone thr
Posted: Thu May 22, 2014 6:39 pm
by krick3tt
You could cook on it for morning coffee. Maybe mount a small vice for your work bench idea.
Re: Miles Pinz Restoration Progress (pic heavy-milestone thr
Posted: Wed Jun 17, 2015 12:22 am
by Jake2015
Miles, any updates on your great build?
Re: Miles Pinz Restoration Progress (pic heavy-milestone thr
Posted: Fri Feb 16, 2018 11:52 am
by davies435
Holy Crap!
I come from WWII Vehicle restoration so am used to seeing this sort of attention to detail on something small like Jeeps, Kubelwagens or Schwimmwagen.....but never on something this size. Well done you, given us all something to strive towards! The gauntlet has been cast down gentlemen......
HOWEVER (I have to mention it, It's been "niggling me") the only criticism I have is the bad door should have at least one rib in it (that the vents don't affect) to match the panels either side.