Page 1 of 1
Front axle boot replacement
Posted: Sat Feb 20, 2010 10:34 pm
by Jim LaGuardia
Front axle boot replacement pictures coming soon.
Posted: Mon Feb 22, 2010 8:58 pm
by Jim LaGuardia
Note:Use caution as assemblies are very heavy
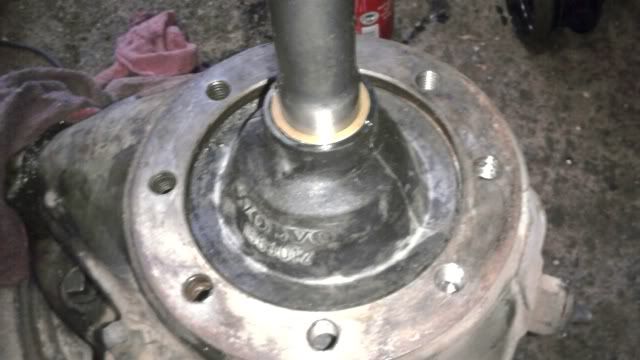
Driver side removal is simple, remove tire, drum, brake hoses, vac line, seperate drag link remove mounting bolts and pull out axle/knuckle assembly. Using suitable tools, remove and replace the boot, remember to transfer the axle guide bushing to the new boot, re assemble

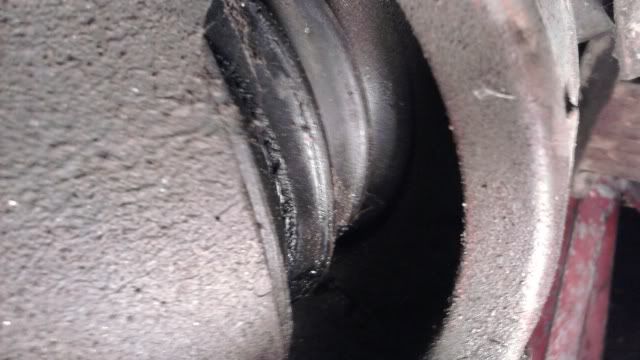
Leaking driver side boot
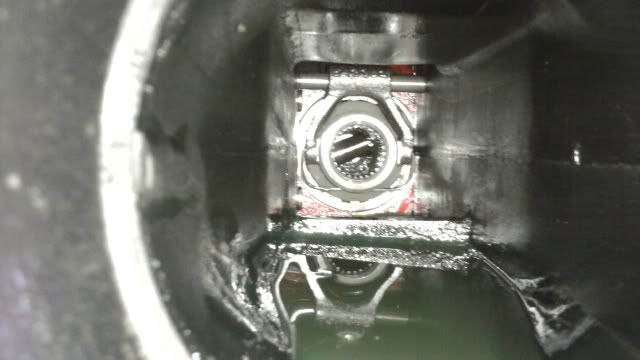
Knuckle assembly
Bushing guide for axle
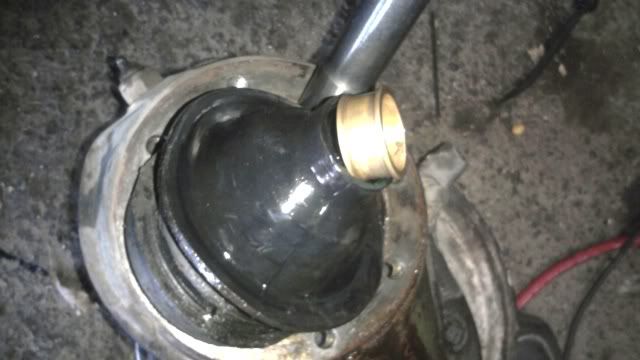
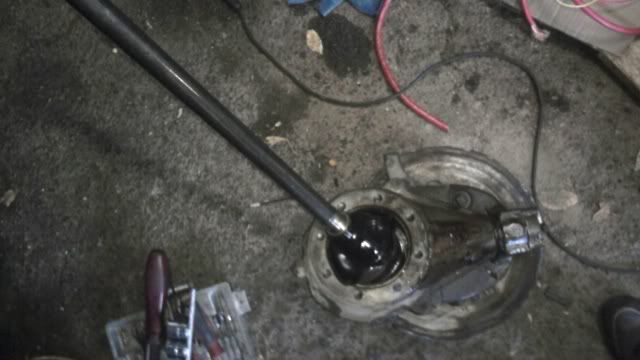
Drive boot till it seats with hammer and drift
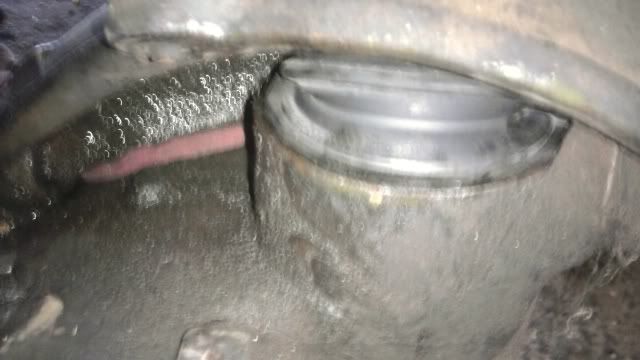
Rubber lip sandwiches between knuckle and diff housing
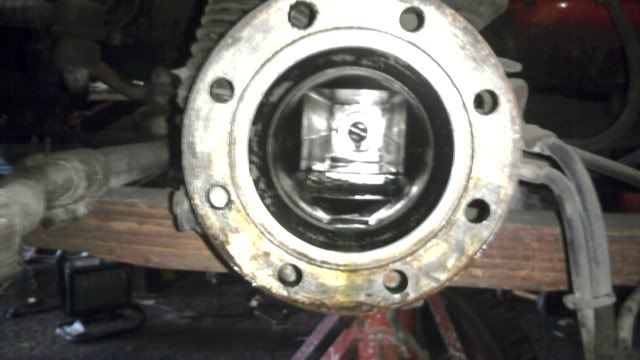
View into axle housing on drivers side
Posted: Tue Feb 23, 2010 8:32 am
by Captain Crank
Jim,
Thanks for posting that. Photos are so great for technical assistance.
I got a talk through from Dennis @ Linden Engineering on this too.
He suggested to pinch off the brake lines to prevent losing all the fluid which should make bleeding easier.
Also to engage diff lock when doing the passenger side.
Between his welcome advice the manuals and your pics, I think I got this sussed.
Now if it would just warm up a bit outside.........
John
Posted: Thu Feb 25, 2010 10:12 pm
by lindenengineering
Hey John
Yes pinching off the brake lines makes bleeding the brakes SOOH much easier.
Also when re-inserting the sub axle assy and pinching down the flange to axle seal joint
DO NOT be tempted to rotate the stub axle through the whole travel--it was never designed to do that!
If you do so it will pull or tear the boot to bits or at least dislodge the boot flange and it will leak!

Rather install the track and drag links then check for rotational freedom.
Have fun in the sun--need some--sick of snow!
Dennis
Posted: Thu Feb 25, 2010 11:05 pm
by Jim LaGuardia
I will post up the passenger side pics soon. I did use pinch pliers on the hoses, but later opted to drain entire system as all wheel cylinders are being replaced

I have a pressure bleeder so I'll just start at the master and then do the lines from furthest to nearest.
On a side note, Swedish is harder to translate than German

Posted: Fri Feb 26, 2010 8:13 am
by Captain Crank
Jim LaGuardia wrote:I will post up the passenger side pics soon.
Can't wait!
On a side note, Swedish is harder to translate than German
Technical stuff especially.
Have you tried Norwegian? I think it is the worst.
lindenengineering wrote:
Also when re-inserting the sub axle assy and pinching down the flange to axle seal joint
DO NOT be tempted to rotate the stub axle through the whole travel--it was never designed to do that!
Just to make sure....You are referring to the front and rear movement as if you were turning the steering wheel, right?
Cuz if something isn't suppose to be done, I will do it.
Have fun in the sun--need some--sick of snow!
Amen to that Brutha!
Dennis
Posted: Sat Feb 27, 2010 7:41 pm
by lindenengineering
Captain Crank
Try this sometime
اسان ، سهل ، بي زحمت ، اسوده ، ملا يم ، روان ، سليس
Which is farsi?
Dennis

جرب هذا في وقت ما
Posted: Sat Feb 27, 2010 9:12 pm
by Captain Crank
Dennis,
I'm glad it wasn't directions to the buried treasure.
I got .......
Easy, easy, easy, calm, Mullah we’re, Rouen, comptez
Dennis
the scab, however, the time we
You win...... that's the worst.
Posted: Thu Mar 11, 2010 2:42 am
by Jim LaGuardia
Ok, here is the passenger side.
You have to engage the axle before removing it to prevent dropping the engagement sleeve. I opted to wrap a rag around the base of the actuator piston.
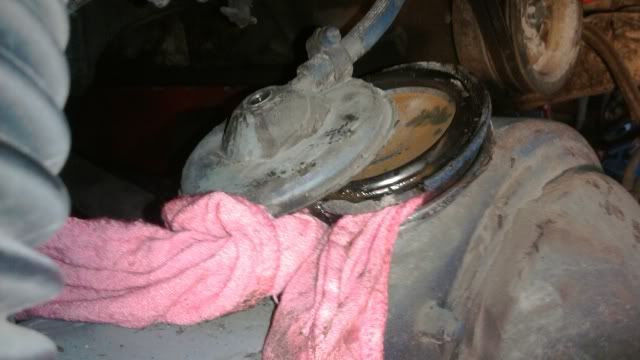
Here is a shot of the mechanism.