
Spring Compressor
Moderator: TechMOGogy
Spring Compressor
I am trying to find a spring compressor similar to the factory, any one know of one for sale? I am having a hard time removing my front axle springs. Thanks Erik
Have done a lot of searching for them, closest I've found is spring compressors for mercedes. They are a internal rod configuration with spring cups, don't know anything about them as far as size and if the rod would fit into the Pinz coil.
http://cgi.ebay.com/ebaymotors/Mercedes ... 6889QQrdZ1
http://cgi.ebay.com/Coil-Spring-Compres ... dZViewItem
Miles
http://cgi.ebay.com/ebaymotors/Mercedes ... 6889QQrdZ1
http://cgi.ebay.com/Coil-Spring-Compres ... dZViewItem
Miles
Lots of Pinz pictures here.......
http://picasaweb.google.com/pinzgauer.depository.1
'73 Pinzgauer 712M
http://picasaweb.google.com/pinzgauer.depository.1
'73 Pinzgauer 712M
http://s7.sears.com/is/image/Sears/0094 ... 6&fmt=jpeg
Will this one work? Sears Craftsman, $49.99.
Or this one:
http://www.harborfreight.com/cpi/ctaf/d ... mber=47890
Or:
http://www.eastwoodco.com/jump.jsp?item ... pe=PRODUCT
Will this one work? Sears Craftsman, $49.99.
Or this one:
http://www.harborfreight.com/cpi/ctaf/d ... mber=47890
Or:
http://www.eastwoodco.com/jump.jsp?item ... pe=PRODUCT
1973 712M
Todd, I bought the sears coil compressor. I can not get it on enough of the springs to really compress it enough to remove it. The habor freight compress looks like it might work but it some what scares me. Milez the inturnal screw will not work because of the over loads But the same manufacture sells one Its #1941 It is $249. witch would be ok I am just not sure it is strong enough what do you think? Thank Erik
I just replaced the ft springs on my truck and I used 2 sets of Harbor freight spring compressors.I started the pull-down with 2 and when that was not enough I would add another past the compressed spring coils to gain more squeeze. There was no issue pulling out my soft collapsed springs,but going back together was another matter! There is a lot of squeezing necessary for the new springs. This is a gloves-safety glasses and butt pucker affair! Also remove the shocks to allow room for the extrs compressors. If I were to to this again,I might just have a suspension shop do the work. 
Mark
Mark
Stock means no imagination!
Volvo TGB1317, .95% Morphed!
68 Haffy
Volvo TGB1317, .95% Morphed!
68 Haffy
-
Jim LaGuardia

- Posts: 1707
- Joined: Wed Apr 14, 2004 3:42 pm
- Location: San Bernardino Ca
- Contact:
You know I didn't have any problems taking off my front springs. I just lifted off the body with a fork lift and the springs just fell out! 
Miles
Miles
Lots of Pinz pictures here.......
http://picasaweb.google.com/pinzgauer.depository.1
'73 Pinzgauer 712M
http://picasaweb.google.com/pinzgauer.depository.1
'73 Pinzgauer 712M
Erik...I actually unbolted the body for removal for restoration purposes. And yes I will have to deal with compressing the springs for reassembly. So I am looking forward to seeing Jims homebrew solution.
Miles
Miles
Lots of Pinz pictures here.......
http://picasaweb.google.com/pinzgauer.depository.1
'73 Pinzgauer 712M
http://picasaweb.google.com/pinzgauer.depository.1
'73 Pinzgauer 712M
-
Jim LaGuardia
- Posts: 1707
- Joined: Wed Apr 14, 2004 3:42 pm
- Location: San Bernardino Ca
- Contact:
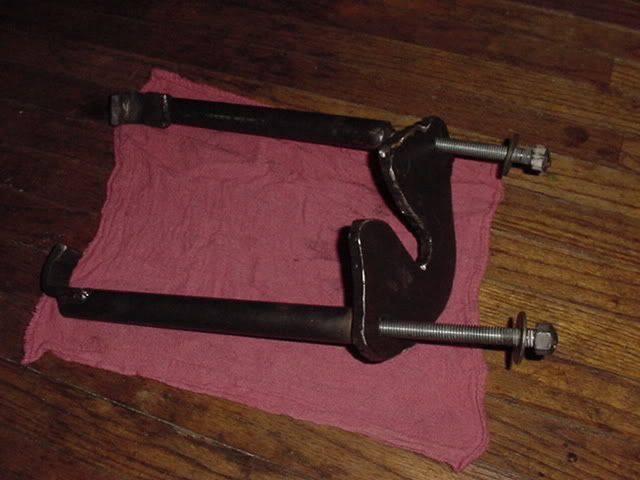
Jim....is that 1/4" plate on the base or 3/8"? I was thinking of something like that but I would like to use the actual piece that fits the spring that is grooved to fit, and weld that onto your flat plate. Just to make it less prone to slipping. Wasn't sure what the shape of the base would be, never even thought of making it one piece, Looks good and a lot more secure than the two piece design. Hate to cut up a perfectly good Pinz part but it'll be worth it to have a safe spring compressor. Thanks for posting and if you can I'd like to see the latest version if there are any changes from the first one.
Think it would be worth having a set of two, one for each side?
Miles
Think it would be worth having a set of two, one for each side?
Miles
Lots of Pinz pictures here.......
http://picasaweb.google.com/pinzgauer.depository.1
'73 Pinzgauer 712M
http://picasaweb.google.com/pinzgauer.depository.1
'73 Pinzgauer 712M
-
Jim LaGuardia
- Posts: 1707
- Joined: Wed Apr 14, 2004 3:42 pm
- Location: San Bernardino Ca
- Contact:
Thenks jim for the pics sorry I didn't say thanks sooner I had My first boy on friday. I have been at the hospital. I am asuming that the all thread is 10 1/2" long? I will try and make up a set next weekend. I hope to have every thing off the truck when dennis or one of his guys arrive to fix what ever is broken.
-
Jim LaGuardia
- Posts: 1707
- Joined: Wed Apr 14, 2004 3:42 pm
- Location: San Bernardino Ca
- Contact:
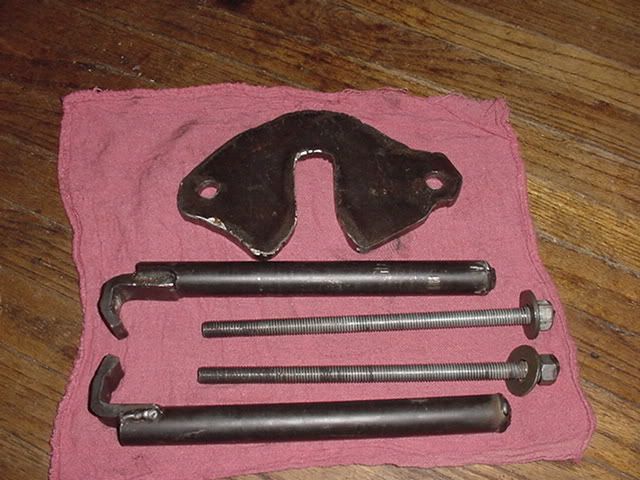
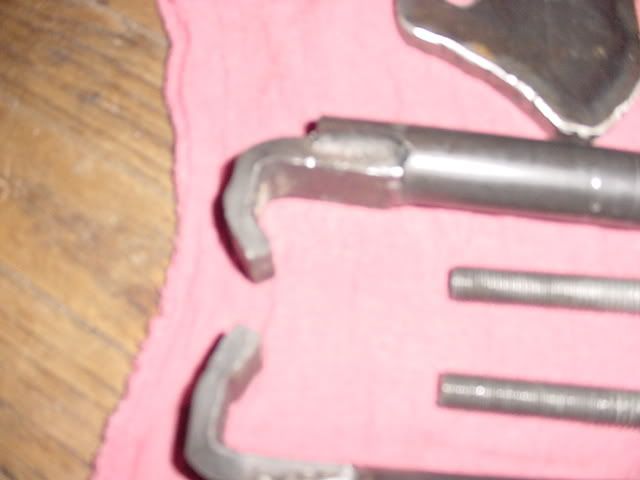
Here's one more pic of the raw materials, cut the threaded rod into 9 1/2" pieces, thread a nut till flush and weld it on, Cut the high carbon 3/4" pipe 10 1/4" and press long nuts into pipe with a press and MIG weld them in place, also drill and spot(MIG) weld them in two places, make hook unds, notch pipe and position hooks to 10 1/2" (inside hook to bottom of pipe) then MIG weld in place. Holes in base plate are 9/16" and 6 3/4" apart.
Lubricate the treads with oil before use.
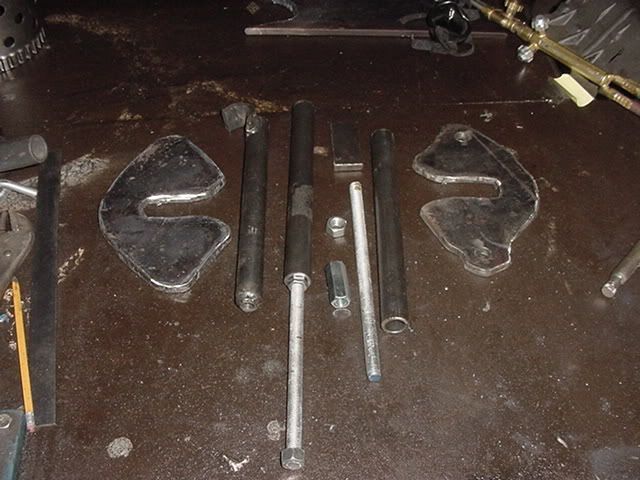
Lubricate the treads with oil before use.