
Reasonable thinking.
If you're finding diff fluid leaking into the wheel drives and overfilling them, then yes pulling the diff is the way to fix it. I don't think it's possible to repair it in the truck.
I found seating the seals inside the axle stub was not clearly explained in the manual. But other than that, it was a pretty "fun" repair. It was fascinating to see the inside of the diff work, especially the locker mechanism function.
It seems like your truck is requiring a lot of repairs, but you're obviously willing to do them. I wish I had your time and energy still. Good luck on the repair.
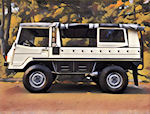
The Warn Pinzgauer
-
undysworld

- Posts: 1776
- Joined: Fri Apr 16, 2004 8:08 am
- Location: Blue Mounds, WI
Re: The Warn Pinzgauer
A lot of repairs, yes but I would say half of that is simply because I am anal about my trucks. Two of the rear boots for example were not cracked yet and could have been left in place. I figure though if two cracked from age, the other two will go soon also. The shifter linkage for the 5spd was ok but did have some slop. Rather than live with it, I fixed it. I do this on all my trucks, last one I sold, an 84 v8 Land Cruiser, I spent a summer and over $5k getting it up to my standards before selling it. It is just how I roll...
I checked the wheel drive yesterday on the side I know the oil is leaking into the boot. It seemed over full but not a lot, maybe a half cup to a cup. The diff didn't seem low on fluid at all, in fact some came out of it when I pulled the overflow plug. When we had the wheel drives off, inside the tubes were not full of oil at all, in particular the one where the oil was leaking into the boot. One thing was for sure, when the wheel drive was pulled at the RHS rearmost axle, it dumped 6-10oz of oil into the boot right away. The other side dumped none. Not being a Pinz expert I am not sure what all this means but I am fixing it up anyways.
Cheers
-
undysworld
- Posts: 1776
- Joined: Fri Apr 16, 2004 8:08 am
- Location: Blue Mounds, WI
Re: The Warn Pinzgauer
If it's leaking into the wheel drive, I believe it's #19 here: http://www.pinzgauer.com/parts.php?cat= ... view=03-10 and fits down within the stub axle. It doesn't get into the boots due to this problem, to my knowledge at least.
If it's in the boots, then it's more likely #7 and or #8.
If it's in the boots, then it's more likely #7 and or #8.
Re: The Warn Pinzgauer
After some investigating I ordered up a bunch more parts. I found some chunks in the LHS portal box on the drain plug. So that is also being addressed while the axle is out.
I got all the bearings, seals, collar and o-rings for the wheel drive. Both sides on the axle that is out of the truck. I am rebuilding both wheel drives.
Picked up the metal ring behind the axle boots and all the related parts. Also got the inner axle seal or ring gear seal. The one inside the housing just behind the ball cup that Undy describes as being the one that overfills the portal box if shot.
I found my #4 plug wire to be in poor condition so I ordered up all new plugs wires. I also got the lubricating wick and a condenser for the dizzy.
Last bit I bought everything to rebuild the e-brake. Not just a disc and steel set but also all the related pins, bolts, sleeves, levers and even a new cable. It will be like new when I am finished. What I found is not bad, just the discs are cracked a lot. But it is all very sloppy and loose showing 38yrs of wear. So it is getting a full rebuild.
Next weekend I plan to get all this stuff into the rear axle and then get it back into the truck.
Cheers
Re: The Warn Pinzgauer
A lot of work happening on the truck this weekend. I got all my parts in hand so am going for it.
I have the wheel drives off the axle that is in the shop. The top of the case really doesn't want to split though. I am 99% sure I got everything removed in order to separate the case but it seems stuck. The retaining pins could be the problem. Hopefully I can get it off today. I don't really need to split the case other than to inspect the R&P's. I do have the o-ring that goes behind the ball cup so was kind of planning to replace that along with all the other parts, put in new grease, ect ect. Just have to see how it goes!
I got all the e-brake parts too. Going to strip the tail cone, e-brake housing and the cone that goes over the witches hat, then sand blast and paint. Some serious paint/undercoating on it. Sandblasting alone won't remove it. Aircraft stripper should get it started though! I started on the witches hat rebuild. All going well so far but I need to pull off the gears that are pressed together inside the witches hat to proceed further. To do that I need to remove the selector shaft that passes through the housing for engaging the locker and runs the fork. Once I got that it should be gravy, press in new bearing and seal and re-assemble.
Other stuff for this weekend are; new rotor in dizzy, new plug wires, gap and install new plugs and then time the motor. Install the remaining four new shocks. Finish cleaning and adjust all 6 brakes plus replace any shoddy springs or retaining pins. Drain trans and fill with Redline MT90. Once axle back in, bleed locker and brakes.
Here to hoping all goes smoothly and I don't encounter anything needing replacement I don't have!
Cheers

Re: The Warn Pinzgauer
Could you take some pics of the e-brake disassembly? I am very interested in this.Nomad wrote: I got all the e-brake parts too. Going to strip the tail cone, e-brake housing and the cone that goes over the witches hat, then sand blast and paint. Some serious paint/undercoating on it.
Ottawa, Canada
1974 710M
2007 2WD Ural Patrol
1974 710M
2007 2WD Ural Patrol
Re: The Warn Pinzgauer
Sorry man, I didn't take pictures of the e-brake tear down. I will though of the assembly.berger wrote:Could you take some pics of the e-brake disassembly? I am very interested in this.Nomad wrote: I got all the e-brake parts too. Going to strip the tail cone, e-brake housing and the cone that goes over the witches hat, then sand blast and paint. Some serious paint/undercoating on it.
I got into all the repairs pretty good last night. Mostly, I worked on the witches hat but a few other things got done too.
Here you can see where the o-ring sits behind the axle wiper. Not totally wasted by corrosion but definitely enough there to cause problems.
All these parts I treated with aircraft stripper, prep for sand blasting. Makes things a lot easy to sand blast.
New & old e-brake parts
Working on the wheel drives while I do all this other stuff too....
Witches hat parts, new & old
All torn down and ready to rebuild.
The gear pressed on this shaft is locktighted. As per the manual, heat up to around 215f and it comes off easily. I just used a mapp gas torch and an infra red thermometer.
Well, time to get back at it!
Cheers
Re: The Warn Pinzgauer
Here are some more pictures of work in progress.
This is the new ball cups. Obviously a change made by Steyr.

new vs old

Parts I have sand blasted and am cleaning up

sand blasted e-brake stuff for the re-furbish I am doing on it.


Cheers
This is the new ball cups. Obviously a change made by Steyr.
new vs old
Parts I have sand blasted and am cleaning up
sand blasted e-brake stuff for the re-furbish I am doing on it.
Cheers
Re: The Warn Pinzgauer
Assembly is going well. I am taking my time and going slow and making sure it is done right the first time.
Cleaned diff halves at mating surfaces.


A bit tricky to put the halves back together, seal them with a sealant, leave slightly cracked, install o-rings, grease and slide in grease wiper/seal + rubber stopper. I decided to not change out the ball cups since these are in good condition.

Yes I know, I am missing a few washers.

new seal and o-ring for the front flange.

I still need to clean the bottom half of the housing where it mates to the tube.

this went on very easy, tapped it on with my hand. Red locktight on the splines.

since the e-brake housing is alloy I painted it with some aluminum paint.

the tail cone re-freshed


more witches hat rebuild

I paid attention when I took this apart, it is tricky to get apart and back together. But if you do it right not to tough.

locktight on the splines and new snap rings.

It has to go in this order before putting into the housing, no other way to really do it. I found it easiest to put the big snap ring into the groove from the inside not the outside of the housing. I have big huge long snap ring pliers though.

all new o-rings, springs, ect.

rebuilt...

Just about ready to put the witches hat on the back of the diff and then start on the e-brake rebuild.

In my opinion, the best sealant you can get.

Cheers
Cleaned diff halves at mating surfaces.
A bit tricky to put the halves back together, seal them with a sealant, leave slightly cracked, install o-rings, grease and slide in grease wiper/seal + rubber stopper. I decided to not change out the ball cups since these are in good condition.
Yes I know, I am missing a few washers.
new seal and o-ring for the front flange.
I still need to clean the bottom half of the housing where it mates to the tube.
this went on very easy, tapped it on with my hand. Red locktight on the splines.
since the e-brake housing is alloy I painted it with some aluminum paint.
the tail cone re-freshed
more witches hat rebuild
I paid attention when I took this apart, it is tricky to get apart and back together. But if you do it right not to tough.
locktight on the splines and new snap rings.
It has to go in this order before putting into the housing, no other way to really do it. I found it easiest to put the big snap ring into the groove from the inside not the outside of the housing. I have big huge long snap ring pliers though.
all new o-rings, springs, ect.
rebuilt...
Just about ready to put the witches hat on the back of the diff and then start on the e-brake rebuild.
In my opinion, the best sealant you can get.
Cheers
Re: The Warn Pinzgauer
Pictures of finishing up the axle.


Top pin is NLA, I had to destroy the stock one on mine. So a bolt it is.

Cheers
Top pin is NLA, I had to destroy the stock one on mine. So a bolt it is.
Cheers
-
TechMOGogy

- Posts: 2831
- Joined: Wed Feb 01, 2012 11:39 am
- Location: Ontario, Canada
Re: The Warn Pinzgauer
Nice!
Great photos so thanks for documenting and I bet the new owner is loving that your doing all this work to his truck
Great photos so thanks for documenting and I bet the new owner is loving that your doing all this work to his truck
Last edited by TechMOGogy on Wed Oct 02, 2013 1:48 pm, edited 1 time in total.
72 Pathfinder | 75 710M 2.7i | 96 350GDT Worker

Re: The Warn Pinzgauer
Your verve for cleaned and painted pinz parts is infectious. I must get back to work immediately.
Fat Fabrications
2993 FM 1647
Winnsboro, TX. 75494
fatfabrications@yahoo.com
(903) 365-2332 shop
(951) 765-7224 mobile
Facebook.com/dokapinz6x6
Www.fatfabrications.com
2993 FM 1647
Winnsboro, TX. 75494
fatfabrications@yahoo.com
(903) 365-2332 shop
(951) 765-7224 mobile
Facebook.com/dokapinz6x6
Www.fatfabrications.com
Re: The Warn Pinzgauer
Thanks!Andre wrote:Your verve for cleaned and painted pinz parts is infectious. I must get back to work immediately.
I found a while back it is really not that hard to take old junk and make it new again. I am actually doing a frame off nut & bolt resto for a client right now on a 1964 Nissan Patrol soft top so have done this before. It just takes the right tools (de-greasing method, sand blaster, wire brush, paint) and lot's of patience. Plus the willingness to get in and do the dirty work. Doing things the hard way (elbow grease, wire brushes only, crappy cleaner, ect) just makes things a huge pain in the ass! I was going to polish the diff casing and or paint it but just don't really feel like getting that far into it. It got painted & re-furbished from the witches hat back so that is what looks re-newed.
I would really love to restore this truck but that is just not going to happen.
Up next I am rebuilding the wheel drives and then the axle goes back in the truck. I recently got all new plugs, wires and the dizzy all finished up. Fired up the truck (without the 3rd axle in it) and timed it by ear. I don't have a 24v timing light and don't plan to buy one for this one time ~ time.
Cheers
Re: The Warn Pinzgauer
No one I know of uses a 24 volt timing light, just use your 12volt jumper battery to power your 12 volt timing light. 
Cum catapultae proscriptae erunt tum soli proscript catapultas habebunt.
Re: The Warn Pinzgauer
Jumper being the #2 battery? :?:edzz wrote:No one I know of uses a 24 volt timing light, just use your 12volt jumper battery to power your 12 volt timing light.
I tried it off the #1 and it did nothing. I did get a pretty good time by ear. Easy to do with 3 people!