Page 7 of 11
Re: Hafi Heavy Cleaning - lots of photos
Posted: Fri Jan 23, 2015 8:24 pm
by TechMOGogy
Hafi is away for the winter - has been for some time now.
Body will be finalized come early spring (that plan has been worked out) and then it is on to the rolling chasis for summer.
I got some new mud tires for my 13" rims - more on that later once I get them mounted and some pics
Re: Hafi Heavy Cleaning - lots of photos
Posted: Sat Jan 24, 2015 2:38 pm
by cascade.king
cascade.king wrote:Almost a forest green.
This photo was taken by the prior owner.. and since the Hafi was treated like a whipped dog by the guy before him, I would be stunned if he had a full respray done.
Haflinger_green.jpg
Just a side note..
The Haflinger Pathfinder "Flat, Forrest Green" paint mystery mentioned earlier in this thread has been resolved.
The back of my reverse light had been "rattle-can" painted by the previous owner. I gave it a dip in parts cleaner, and the Krylon fell off, leaving the original green. This green part had been inclosed in the engine bay and did not get beaten by the sand and sun of Utah it's whole life.
After a wipe down and towel buff..
L511 Birch green.
I am an idiot.

In my defense, the exposed parts I have are WAY darker. I hit them with No7 Polish, and they lightened up.
Duh.
Re: Hafi Heavy Cleaning - lots of photos
Posted: Sat Jan 24, 2015 3:58 pm
by TechMOGogy
I have a few rattle cans of Birch Green that are just sitting here (had them custom mixed when I thought my truck was BG

They are single stage paint)
I sold most but if your interested, let me know and you can have them if your willing to pay for the shipping
Re: Hafi Heavy Cleaning - lots of photos
Posted: Wed Apr 08, 2015 10:38 pm
by Yakov
How is this project going? No updates for a few months now! =)
Re: Hafi Heavy Cleaning - lots of photos
Posted: Thu Apr 16, 2015 12:55 pm
by TechMOGogy
Snow and cold will do that - I can only work on it when it is warmer

Getting things prepped for Spring so that I can get it back on the road - my goal is this Summer as it has been
dragging on way to long!!
Re: Hafi Heavy Cleaning - lots of photos
Posted: Mon Jun 01, 2015 12:50 pm
by TechMOGogy
Getting warmer (ok it has been warm for a while now - just still doing house and yard stuff)
Got my 13" rims powder coated
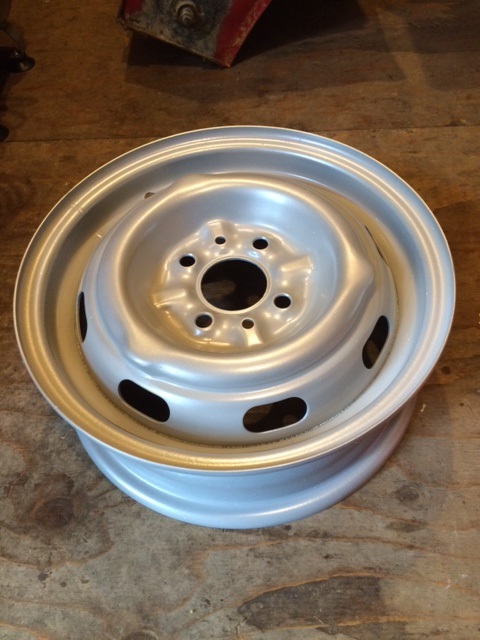
- IMG_3339.JPG (102.58 KiB) Viewed 7685 times
12" rims the same color
Cleaned up the gear shift - now it just needs to go back together
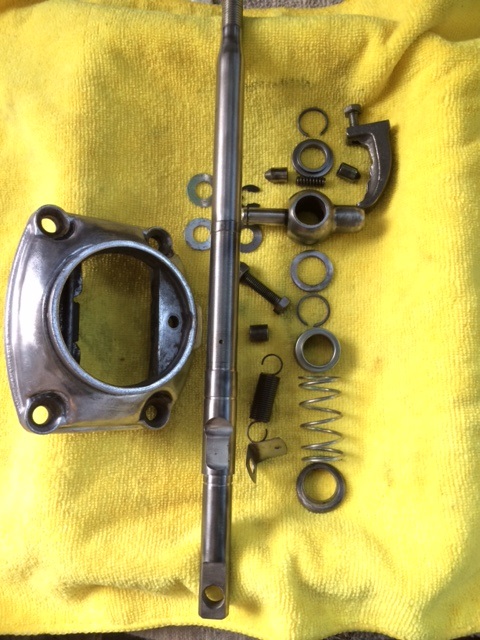
- IMG_3328.JPG (122.46 KiB) Viewed 7685 times
Re: Hafi Heavy Cleaning - lots of photos
Posted: Mon Jun 01, 2015 3:57 pm
by cascade.king
TechMOGogy wrote:
Cleaned up the gear shift - now it just needs to go back together
I can't get the screws (Phillips-head) holding the base plate on to come loose on mine..
I am getting a bad case of non-seized hardware envy.
Re: Hafi Heavy Cleaning - lots of photos
Posted: Mon Jun 01, 2015 5:25 pm
by Heinkeljb
Lots of "PlusGas" - penetrating fluid before you start trying to undo things, preferable from both sides.
Then use something like a Impact Driver or a Rattle Gun to give the screw a "shock" whilst turning it. Just make sure you have a good fitting screwdriver bit that fits the screw heads properly or you will end up having to drill the heads off. Then you might be able to get a pair of vice grips on the remaining shaft of the screw to undo it. There again you might have to cut the shaft off flush and drill and tap the thread again.
So you have several ways / opportunities to remove the offending screws!
John
Re: Hafi Heavy Cleaning - lots of photos
Posted: Mon Jun 01, 2015 7:56 pm
by TechMOGogy
What John said!
I soaked them for a couple days and then used a manual impact with large Phillips bit
I whacked each and out they came
Good luck!!
Re: Hafi Heavy Cleaning - lots of photos
Posted: Mon Jun 01, 2015 8:24 pm
by Jimm391730
If you are unfamiliar with a "manual impact" tool:
http://www.harborfreight.com/impact-scr ... 37530.html
When I lived in the rust belt many decades ago, this tool was the only thing useful for removing screws in plastic tailights that were froze in place - without damaging the plastic lens! Just be certain that it is set to loosen and not tighten (can be used both ways; I've never used it for tightening). Put the largest bit in that still fits the screw, twist to loosen as best you can, while holding in and twisted hit the back with a hammer. The blow drives the bit in tightly, and an internal cam twists the bit more than your hand torque.
Re: Hafi Heavy Cleaning - lots of photos
Posted: Mon Jun 01, 2015 9:28 pm
by cascade.king
I like it.. Do you recommend 1/2 or 3/8 drive for usefulness?
Re: Hafi Heavy Cleaning - lots of photos
Posted: Tue Jun 02, 2015 12:29 am
by Jimm391730
Since I only have used mine for screws, either 3/8 or 1/2 should work just fine. I have never tried larger hardware with it.
Re: Hafi Heavy Cleaning - lots of photos
Posted: Tue Jun 02, 2015 1:03 am
by Profpinz
You guys must have the knack as I've never had much success with manual impact drivers

I've got a phillips head screw adapter that I can use on an air impact wrench, but if that doesn't work I usually just weld an M8 bolt onto the screw head and wallah!
The heat of the weld and the torque I can apply through the bolt head have always done the trick....... so far!!
Re: Hafi Heavy Cleaning - lots of photos
Posted: Tue Jun 02, 2015 1:38 pm
by 63rover
The trick of the manual impact screwdriver is two part. 1. use the largest bit that will fit the head. 2. with the drive direction set properly keep a firm force applied in the direction to be driven and then give it a good wack with a substantial hammer. It may take a few solid hits but it will work. I've never broken anything yet. (knock on wood)
I like the 1/2 inch and use adapter for 3/8 and other bits. Especially nice on rusty torx.
Cheers, Clive
Re: Hafi Heavy Cleaning - lots of photos
Posted: Tue Jun 02, 2015 2:40 pm
by Heinkeljb
If you want the real trick to it, use two hands to push the bit on to the screw AND at the same time wind the impact drive in the direction you want the screw to travel in to take up any "slack", then trust someone else to give the impact driver a good clout!
Just like using a sledge hammer to put a post into the ground..... Miss and someone will be sorry!
It does work but obviously if you have access to an air driven one that would be the best solution.
John