Page 1 of 2
New member with old 712M
Posted: Sun Feb 22, 2015 11:17 am
by ako
Hi. Just got my first Pinzgauer - 1984 712M.
It is decommissioned from the Oman Military. Hence the lovely paint job (desert tan underneath). It will not be legal to run military paint job here (in Dubai).
Lots of work to do, but first up will be get the missing bits to try and start her up. These will include batteries, distributor, #4 spark plug lead, fuel pipes to/from fuel pump, throttle linkage to rear carb, and hopefully not too much else. Other cosmetic items are missing or damaged as well.
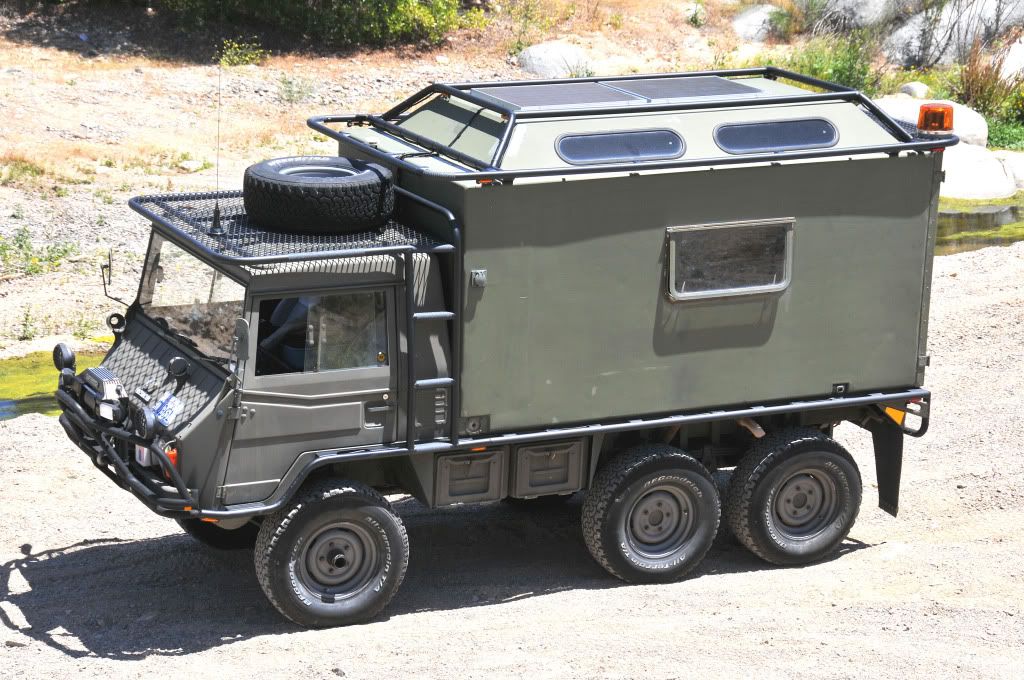
The workshop truck below belongs to a friend and his Dad. They are going to turn the workshop into a camper, early planned stage on layout though.
I seem to have some features the Swiss/Austrian models don't. As far as I can tell they include a long range tank, front snorkel/air cleaner, side vents for cab, drop side on front left portion of troop carrier (only 10 rear seats due to access point), cab door locks even though military model, split windscreen, brush bar (dented), Michelin X tyres as std.
Re: New member with old 712M
Posted: Sun Feb 22, 2015 11:33 am
by McCall Pinz
I always think its interesting to see the small variations between trucks from different countries. Thanks for posting and good luck!
Re: New member with old 712M
Posted: Sun Feb 22, 2015 1:04 pm
by 4x4Pinz
I would recommend an SSI system versus buying a distributor. You will get all the bits you need to complete the ignition system and it will run much better then the distributor ever could. An easy install as well. cost difference would be negligible since you have to source a distributor anyway.
Re: New member with old 712M
Posted: Mon Feb 23, 2015 10:55 am
by ako
Thanks for the tip 4x4Pinz.

I have already read the PinziSSI thread, and if I can't source parts locally for the 'dealer' then I was going to buy the SSI kit.
Re: New member with old 712M
Posted: Mon Feb 23, 2015 11:35 am
by TechMOGogy
I like the fold down side!
Any chance you could take a couple more pictures (in and out) of the air vents?
Looks like a fun project for you!
Re: New member with old 712M
Posted: Mon Feb 23, 2015 1:08 pm
by ako
Funnily enough the fold down side is riveted up. So they ordered it, lost 2 seats and then decided they didn't like it.
Can post some more pics of the vent, think Prof Pinz said it was called a tropical vent in another thread. There was a thread somewhere about a LR product that would fit.
Re: New member with old 712M
Posted: Mon Feb 23, 2015 1:23 pm
by TechMOGogy
ako wrote:Funnily enough the fold down side is riveted up. So they ordered it, lost 2 seats and then decided they didn't like it.
Can post some more pics of the vent, think Prof Pinz said it was called a tropical vent in another thread. There was a thread somewhere about a LR product that would fit.
All the vent threads lead to dead ends with LR's and horse trailers.
I have set of original vents and seeing your pics will help get them installed in the correct location!
Cheers,
Dan
Re: New member with old 712M
Posted: Mon Feb 23, 2015 1:30 pm
by ako
No worries Dan. Can get more info for you.
Cheers, Mick.
Re: New member with old 712M
Posted: Wed Feb 25, 2015 9:41 am
by TechMOGogy
This popped up on ebay (don't know anything about it)
http://www.ebay.com/itm/Pinzgauer-Bosch ... SS:CA:3160
but I would still buy the SII kit
Re: New member with old 712M
Posted: Thu Feb 26, 2015 1:23 am
by ako
Hi Dan,
Here are some pics of the vent I found on the computer. I will be able to take some measurements on the weekend.
Note the internal shot shows the spring is missing on the RHS. Don't have a view of the internal LHS which does have the spring in place.
Hope these will help somewhat.
Cheers,
Mick
Re: New member with old 712M
Posted: Thu Feb 26, 2015 8:16 am
by TechMOGogy
Perfect!
Thanks
edit: looks like the left and right are not installed the same distance from the front edge (but could just be the angle or front end damage making it look that way)?
Re: New member with old 712M
Posted: Thu Feb 26, 2015 8:39 pm
by Andre
drivers side is further back to allow clearance for the brake master cylinder.
Re: New member with old 712M
Posted: Thu Feb 26, 2015 8:51 pm
by TechMOGogy
Andre wrote:drivers side is further back to allow clearance for the brake master cylinder.
So why not make them even?
Let's make mine even

Re: New member with old 712M
Posted: Thu Feb 26, 2015 9:23 pm
by Andre
OK. Also had to mention, That is only the Second Work Box with the crested roof I've seen either live or in photo's.
Need deck plates?
Re: New member with old 712M
Posted: Fri Feb 27, 2015 9:47 pm
by Jimm391730
Thought I'd share what I did with my W, converting it into a camper: My hobby is astronomy and I bought my 712W specifically for that purpose, to haul all my gear around and still be able to camp. So rather than have a "conventional" camper with a dinette, I elected for a fold out bed that goes across all my stuff that I haul around. Note that this truck might be more accurately called a radio command truck (which I believe it was) and not a workshop. The Swiss desired the raised roof for headroom, but they also removed the spare tire compartment and used that area for cabinetry and a power converter box.
All the dark cabinetry was stock from the Swiss military, all the blonde wood is the part that I created. I have an Engel fridge at the back right, and wanted the bed to be high enough to clear it. Underneath is a small microwave that is powered by an inverter; dual batteries make a 24V power source that is charged by the solar panels on the roof, and keep the fridge running indefinitely here in sunny California. The bed folds in half, against the passenger side wall (my box had no window on this side). The mattress (3" foam) is split in two, and the canvas cover has a fabric hinge to keep it together when opened.
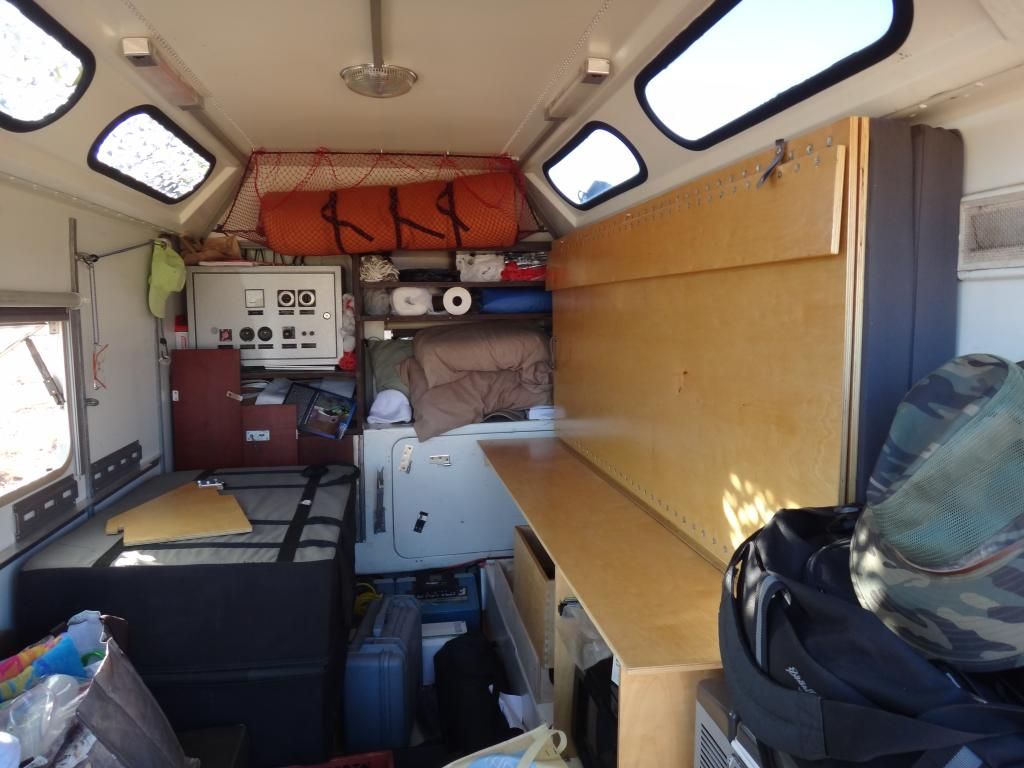
Using parts of hinges, I put a support at the front of the box to hold the vertical 6" beam that hinges out; this makes the center of the bed very sturdy. A similar hinge pin at the left side of the floor area holds a piece of plywood that supports the rear of the center beam. Then the second half of the bed hinges over and rests on a piece of aluminum angle that is attached to the driver's side wall.

Then the mattress is unfolded; it is 74" long, 60" wide (a "short" queen size). I used nylon straps and heavy snaps to hold the folded be against the wall when not in use; the two middle supports are stored using similar hinge pins against the Eberspacher heater door.
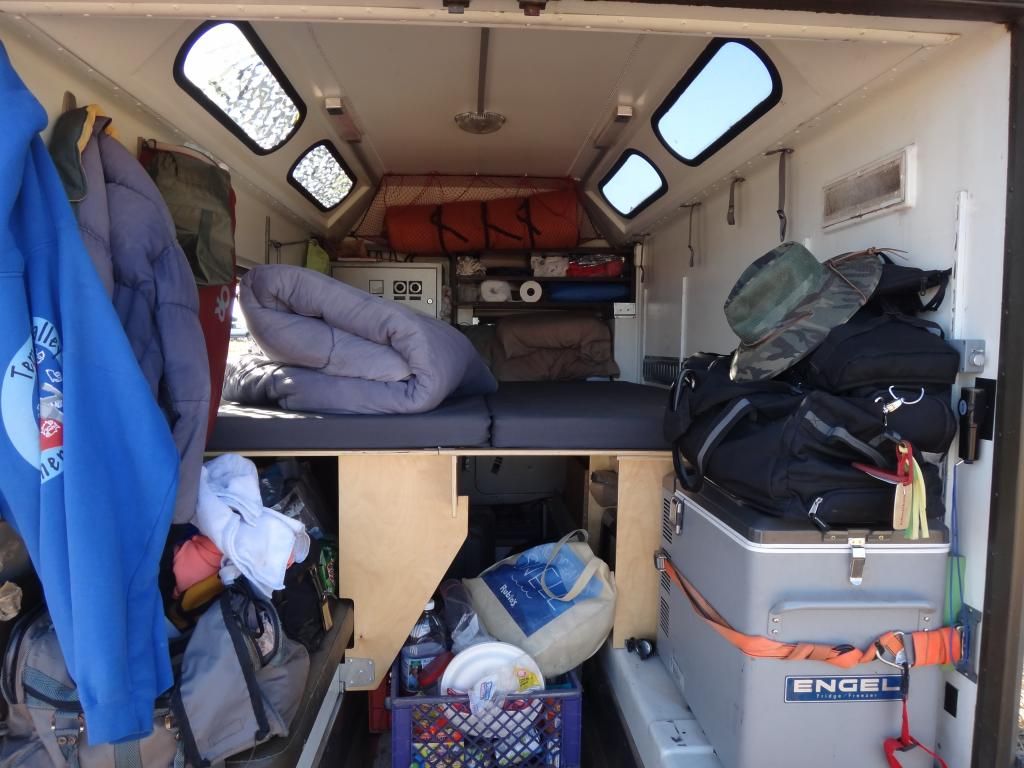
My wife camped with me for over two weeks last year, and gave her approval. The exoskeleton (that Andre made, and did a great job, too!) is very handy for tying off tarps or camo netting, and I tie off a portapotty/shower screen to it as well (on the passenger side). The whole design is certainly not conventional but it was the best fit for my needs. Let us know what you come up with during your camper build.